Tuesday, January 10, 2006

Success and an Almost success!

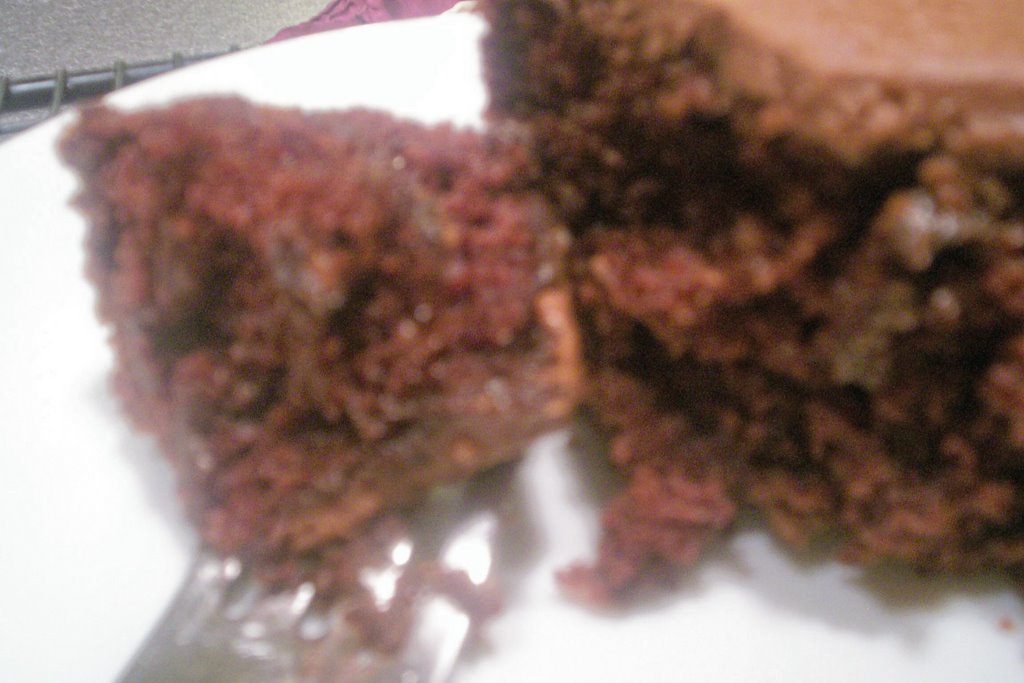
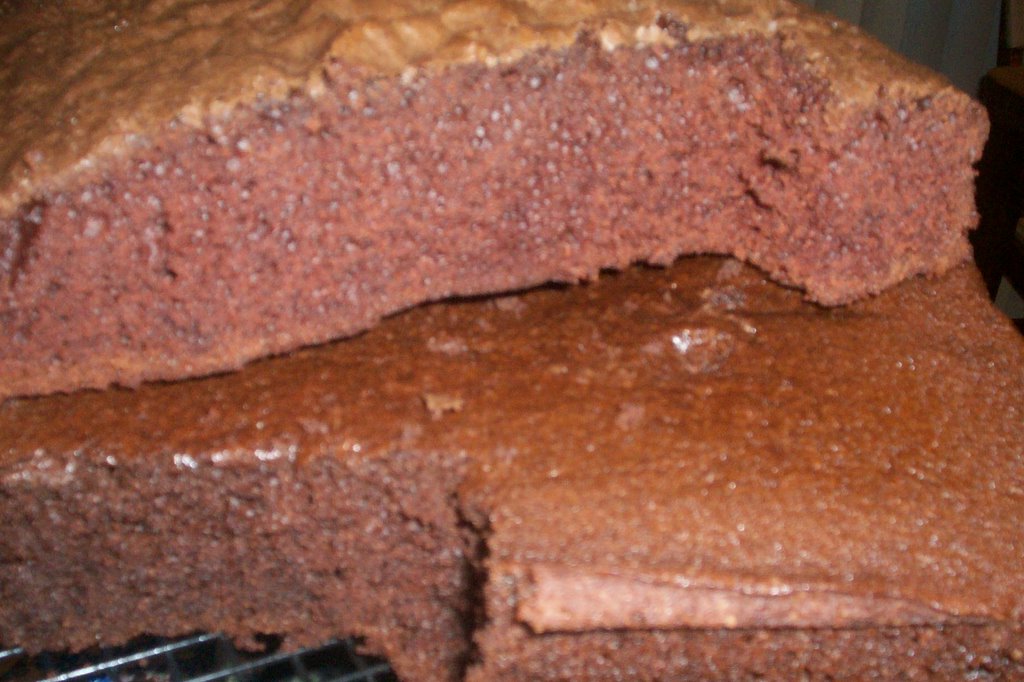
Let's start with the almost success, pictured above. Today in my quest to find Rachel's chocolate wedding cake I tried two more recipes. The one on top is actually Baker's One Bowl Chocolate Cake. The change I made there was to use Ghirardelli chocolate chips instead of the semi-sweet baking chocolate. I liked it immediately. It has a nice chocolate flavor, it is super easy, and it has a nice moist crumb to it. The cake on the bottom is the recipe off of the back of Ghiardelli Unsweetened Cocoa powder. Again, a good cake, this one with a deep chocolatey flavor. Really close to what I am looking for. But I really like the texture of the Baker's one. So, I plan to combine the two recipes and see what the amalgam will bring me. My intent is to use the Baker's recipe as my base, subbing some of the cocoa for some of the flour, and I plan to add a tiny bit of espresso powder to the melted butter and chocolate to deepen the chocolate flavor. I am hoping for success. I will share the final recipe once I am happy with it. In the meantime, if you would like the recipes I've used today, get yourself a can of Ghardelli Unsweetened Cocoa powder, and Baker's Semi-Sweet Baking Chocolate. :-p

Now for the success of the day. Pot Roast. I've always thought I had a pretty good pot roast. Although occassionally I overcook it, I have never thought ill of my standard boring pot roast. Until today. In my effort to utilize my cookbooks more, I turned to Fresh Every Day by Sara Foster. Her recipe for Mom's Pot Roast produced not only a fantastic pot roast, but seriously, the most delicious pan juices (read:gravy!) that I have ever experienced. I did make some minor changes, and will do them again in the future. The one major change I made was that I did not use the one cup of red wine called for. Instead I used 1/4 cup Port and 3/4 cup water. I truly think that is what made my pot roast shine. Here is the recipe with my changes included. I did not add additional vegetables for eating with the roast. Instead I strained out the carrots, onions and herbs, and turned the remaining liquid into a fantastic gravy. We poured this over the roast, and over some garlic roasted potatoes. Yum. I'm looking forward to using up the leftovers.

Mom's Pot Roast

Serves 4 to 6

1 3-pound chuck roast, at room temperature
Salt and freshly ground black pepper to taste
2 TBS canola or safflower oil
1 large onion, peeled and cut into 8 wedges
4 carrots, peeled and cut into 2-inch pieces
6 fresh thyme sprigs
4 fresh rosemary sprigs
¼ cup port
¾ cup water
4 to 6 cups beef broth
Additional carrots and potatoes if desired

Preheat the oven to 325.
Season the roast generously on all sides with salt and pepper.
Heat the oil in a large dutch oven, or large ovenproof skillet over medium high heat. Add the roast and sear to a rich brown color, about 2 to 3 minutes per side. Transfer to a plate and set aside.
Add the onion, carrots, thyme, and rosemary to the pot. Cook, stirring often, until the vegetables are light brown and the onion is soft, 3 to 4 minutes. Return the roast to the pan (lay directly on top of vegetables). Add the port and water, let cook for 1 minute. Add the beef broth until it nearly covers the roast (but not quite). Bring ot a boil over medium heat.
Cover with a lid or foil, and place in the oven to roast for 2 hours, 30 minutes. If you are going to add additional carrots and potatoes, this is the time to add them. Continue to cook another 40 to 60 minutes, or until the meat breaks up easily with a fork, and the vegetables are tender.
Transfer the roast to a shallow serving dish. Remove the herbs from the cooking liquid. Pour the vegetables and liquid over the roast and serve.
OR: Strain the vegetables and the herbs out of the liquid. Add a slurry of water and flour and cook to boiling over medium high heat. Add additional salt and pepper if desired. Serve gravy alongside roast.

Monday, January 9, 2006

Pantry Challenge- Red Curry Paste


So I've had a jar of Patek's mild curry paste lurking in my fridge for a long time. I bought it several months ago to make a coconut and shrimp soup. The soup was good, needed some tweaking, but the paste has sat ever since. The good thing is that curry paste lasts a REALLY long time. But I felt a hankering to use it, as I do enjoy the stuff. So today I headed to the store and picked up some plain old boneless, skinless chicken breasts. The last time I combined the curry paste with chicken, I simply sauteed it and added some tomato sauce. Good, but not what I wanted. After looking through a couple of recipes, and nothing struck me, I saw a mention of yogurt.

So I took a few spoonfuls of yogurt, added the curry paste and other magic ingredients and marinated my chicken breasts. After their bath, the breasts met their fate underneath the broiler. And Mmm was it good. The yogurt sauce kind of baked on, and the result was a perfectly done chicken breast. Andy declared it an instant hit, although he did help me dissect it and plan for the next appearance. It will need to marinate longer, and I need to conquer my fear of chutney, as that would be the perfect finish to the dish. Tonight I served the chicken with roasted vegetables, and the kids had macaroni and cheese. Here is the finished recipe.

Easy Yogurt Spiced Chicken

3-4 boneless, skinless chicken breasts
1 cup plain yogurt
juice of 1/2 lemon
1 1/2 TBS mild red curry paste
pinch of salt
black pepper to taste
1/4 cup chopped cilantro

Combine everything except the chicken in a large bowl. Toss the chicken with the sauce and marinate in the fridge for at least 2 hours (8 at the most), turning chicken from time to time.

Cover a broiler pan with foil. Heat the broiler to high. Place the chicken under the broiler, and cook for 5-7 minutes, turning as the chicken starts to brown. Cook for another 5-7 minutes, or until the juices run clear. Serve immediately.

Thursday, January 5, 2006

Another good one.


Tonight I returned to The New York Times Chicken Cookbook. I am attempting to find new ways to cook chicken for easier weeknight meals. So far I am succeeding. Usually if I have a cut up chicken, or chicken parts, my first reaction is to simply bake it. Which is good, but it's getting a little old. So this week I am mastering the art of braising. The Mustard Chicken the other night was an excellent example. Tonight's Chicken Paprikash is another such creature.

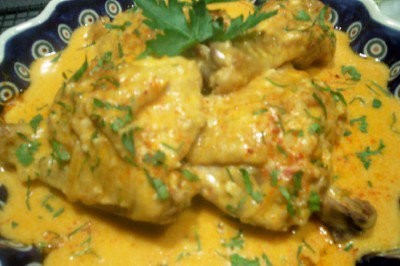
Chicken Paprikash is what it sounds like. Chicken is browned first and then braised in a liquid containg lots of paprika. I have never made a Paprikash, and this won't be my last. My first thought tonight as I tried my first bite of chicken was that the flavor was subtle. Silly, I thought to myself, Paprika is subtle. The sweet earthiness of the paprika really shone though, and with a few minor adjustments, this dish will be a winner. It is most definitely a keeper, but I would like to see double the onions, double the garlic, and adding some Hot or Smoky Paprika to the Sweet Paprika for added flavor. The recipe as written made a lot of sauce that would have been fantastic over some egg noodles. We had baked potatoes, which worked fine for me, but it really begged for some noodles to soak up the sauce. So we will make this again. Andy deemed it a keeper, and that's enough for me.

Later this week/weekend, I have one more braised chicken dish that I plan on trying. Until then, here is the recipe for Chicken Paprikash, adapted from The Best of Craig Claiborne.

Chicken Paprikash

1 3-pound chicken, cut into serving pieces
Salt and freshly ground pepper to taste
2 tablespoons unsalted butter
1 cup thinly sliced onions
1 tablespoon finely minced garlic
1 tablespoon sweet paprika (I used Penzey's Hungarian Sweet Paprika)
1/2 cup fresh or canned chicken broth
1 cup sour cream (I used reduced fat)
1 tablespoon flour

1. Sprinkle the chicken with salt and pepper.
2. Melt the butter in a heavy skillet and add the chicken pieces, skin-side down. Cook over moderately high heat for about 5 minutes and turn the pieces. Continue cooking for about 5 minutes until brown on second side.
3. Sprinkle the onions and garlic around the chicken pieces. Sprinkle with paprika and stir. Add the chicken broth and cover. Simmer for 10 minutes or longer, until the chicken is cooked. (Mine was about 20-25 minutes over med-low heat.)
4. Remove the chicken to a warm serving dish.
5. Blend the sour cream and flour and stir it into the sauce. Cook, stirring, for about 1 minute. Pour the sauce over the chicken.
Yield: 4 servings

Wednesday, January 4, 2006

The Great Cake Hunt


So for those who don't know, Rachel and Cody's wedding is coming up quickly, on February 18th. I have been honored by being asked to make the wedding cake. At least I think I'm honored. :-) Rachel would like three layers. The largest layer will be a chocolate cake with a fudge filling. The next layer will be a white cake with red sprinkles throughout and raspberry filling. The top layer will be a lemon poppyseed cake with lemon filling. The whole deal will be frosted in a Vanilla Buttercream, dusted with luster dust, and decorated with flowers- edible if I can get them, otherwise they will be silk flowers.

Well, the first challenge is to find good cakes. This past weekend I tested the white cake, and I found a winner right off the bat. Elegant White Cake is a recipe by the good people at King Arthur Flour. It is a fabulous white cake. It is not a dry cake, yet it is not overly moist. Too moist of a cake will crack while layering and while cutting, so texture is key for the wedding cake. I am searching for two components for each cake. The main component is definitely flavor. The cake must be good. So today it was on to chocolate. When I make a homemade chocolate cake, I usually reach for a Devil's Food cake. I just love them. But they are not super chocolatey- which I am looking for in this cake. So today's attempt led me to Val from the CLBB. I really, really, value her opinions and recommendations on baking, so I wanted to try her cake first.

Preacher's Cake is incredibly easy, and is very good. While it is not chocolatey enough to be part of my wedding cake, it is a fantastic cake. I will enjoy eating what remains of it. It does remind me of the Devil's Food cake, but this has something more to it, I can't really say what it is, but it is an instant hit, and will become my quick go-to chocolate cake. So here is the recipe- it's calling your name! Try it!
Preacher's Chocolate Cake

Recipe By : ValChemist on CLBB

1 c brown sugar

1 c sugar

1/2 c shortening

2 eggs -- beaten

2 c flour

1/2 tsp salt

2 tsps soda

1/2 c cocoa

1/2 c buttermilk

1 c boiling water

1 tsp vanilla

Buttercream Frosting:

1 lb powdered sugar

1/2 c butter -- softened

1 tsp vanilla

3 tbsps cream -- (2- 3 tbsp)


Cream sugars and shortening; add eggs and beat very well. Add dry ingredients alternatelly with milk, beating well after each addition. Fold in boiling water and vanilla.
Pour in a greased 13x9 pan and bake 30-35 minutes in a preheated 350 oven. (can also be baked in 2 9-inch round pans for 25-30 minutes)
Cool cake for 20 minutes. Invert onto serving platter. Cool cake completely. Frost with buttercream frosting.

Tuesday, January 3, 2006

The Underrated Chicken Leg


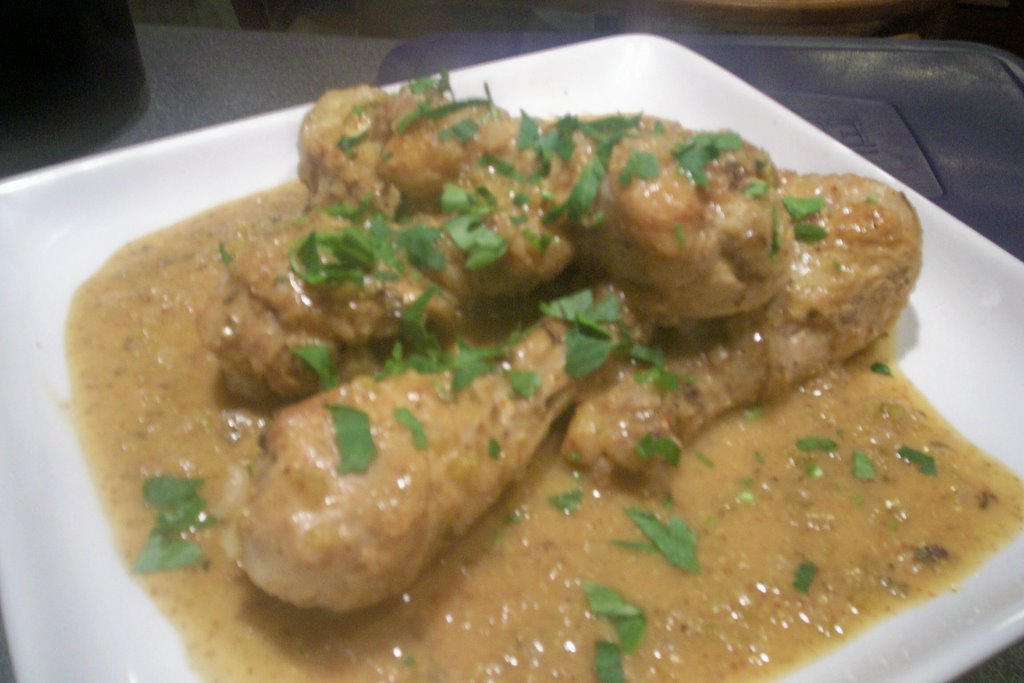
I changed my mind three times today before I decided to go ahead and make this chicken. I went back and forth as to whether or not it would be well received by my family. But Braised Chicken Legs In Mustard Sauce was fantastic. I pulled this recipe out of a yet-unused cookbook in my collection. I've had this book for about 4 months now, and have flipped through it twice. One of my New Year's Resolutions is to utilize my cookbooks more. This particular cookbook is The New York Times Chicken Cookbook. I will most certainly be making another visit to this cookbook, and will definitely repeat this recipe.

What struck me first about this particular recipe is that it features chicken legs. You rarely see a recipe that features just the leg. I read it through, and most of the ingredients are things I have on hand anyways. I wasn't disappointed. My big change to the recipe was to swap out the beer for additional chicken stock and a few dashes of worchestishire sauce. Andy's beer supply is running a little low, and I wasn't sure exactly what he would get angry about me using for dinner. So I left it out. If we missed it, I certainly can't tell because the kids loved it, Andy loved it, and I loved it. The sauce was fantastic and was great dribbled over rice. It would be equally good dribbled over potatoes, or sopped up with bread. I used half the chicken called for, but made a full recipe of sauce. The next time I make it, Andy would like me to try using other chicken parts, and I also want to double the sauce if I can without wrecking the integrity of the dish.

Anyway, here is the recipe. The mustard is not as noticable as I was expecting, so give it a try. Easy weeknight fare for me.

Braised Chicken Legs in Mustard Sauce

3 Tbs. Olive Oil
12 chicken legs
1/2 cup finely chopped onion
1/2 cup finely chopped celery
1/2 tsp rosemary, fresh or dried (I used fresh)
1/4 cup dark beer (I omitted)
1/2 cup chicken stock or brown stock
1/4 cup wholegrain prepared mustard (I used Luzianne Creole Mustard- our fave)
salt and freshly ground black pepper
2 Tbs chopped fresh Italian parsley

1. Heat the oil in a heavy casserole large enough to hold the chicken tightly in a single layer. Add half the chicken legs, brown over high heat, remove from the pan and repeat with remaining chicken. Lower heat, add the onions and celery. Saute until tender, about 8 minutes. Stir int he rosemary, beer, and stock.
2. Return the browned chicken to the pot, cover and cook over low heat until it is cooked through, about 45 minutes, turning once during cooking.
3. Remove the chicken from the pot and increase the heat to high. Stir in the mustard, season to taste with salt and pepper and return the chicken to the pan, basting it with the mustard sauce. Transfer the chicken to a serving platter and spoon the sauce over the top. Sprinkle with parsley and serve.

Yield: 4 servings
Author: Florence Fabricant

Monday, January 2, 2006


I don't have much new to post tonight. Some friends of ours stopped in today and thrust a pair of baby back ribs into my hands, saying they'd be back in two hours. :-) So we shared a fantastic meal of ribs tonight, and unfortunately, the pictures don't look too appetizing. You know...the charred flesh thing...

Anyway, here is another picture of my angels. They are peas in a pod, and here is a great picture of the two of them doing something they love to do best- give each other a hug.

Stew rediscovered


I love stew. It is another one of those comfort food things. My only problem is that I don't make a fine stew. Except for my chicken stew, but since that is really my pot pie filling without the crust, it doesn't really count. In the January issue of Cooking Light magazine they have a feature on stews. At first I looked past those recipes. Who needs a recipe for stew? Isn't it just dump in the pot and cook? Guess what- it isn't. They provided some very good information on the different steps of stew making, and they are right on the money. After a second glance, I thought, why would I want to make a plain old beef stew? Well, after a trip to our butcher resulted in two pounds of gorgeous looking stew meat, I changed my mind.

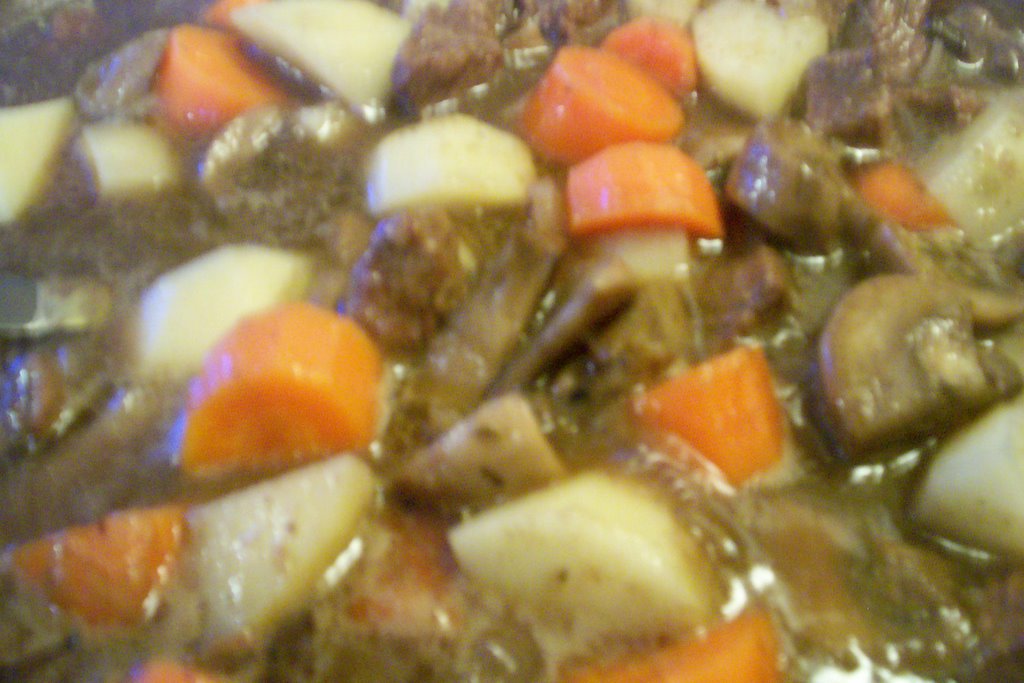
Basic Beef Stew with Carrots and Mushrooms is exactly what I was looking for in a hearty beef stew. I was leary about it on several layers. The first being the cup of red wine. I really don't like dishes where you can taste the wine. I like to drink a glass of wine- but I really don't care for wine flavored meats. Blech. But when I saw that the wine cooked down for 2+ hours, I thought I should try it. I was also leary about the stew thickening up, I didn't want a stew flavored soup either. But I tackled it anyway- trusting the wisdom of the Cooking Light staff. And yes, it was very good. Delicious in fact. My few changes I am sure did not change the integrity of the dish in any way. I could not locate cremini mushrooms, and for some reason my store was out of all mushrooms execpt for large button mushrooms, so I used those. Next time I would like to try the cremini's as they have that hint of woodsiness to them that I think would have punched up the stew a bit. The other change I made was in the amount of oil called for. I really wanted to give my new stainless a whirl, so I had to use more oil than called for, and eliminate the cooking spray.

All in all, I thought the stew was very good, and will deinfitely be repeated. It will be a fantastic make ahead dish, and while I suspect would freeze nicely, I won't be able to find out as my sister took the leftovers home with her. I will most definitely be meandering my way through the remaining stews in this issue of Cooking Light. Here is the recipe, courtesy of the CL website. A nice loaf of a crusty artisinal bread makes this a fabulous meal. Enjoy.

Basic Beef Stew with Carrots and Mushrooms
From Cooking Light

A crowd-pleaser, this recipe is justifiably a classic. Purchase precut lean stew beef, or cut lean beef sirloin or chuck into bite-sized pieces. White potatoes, not to be confused with baking potatoes, are waxy in texture and hold up well in soups and stews; you can substitute red potatoes. Halve any mushrooms that are larger than 1 1/2 inches.

1 tablespoon olive oil, divided
1 pound small cremini mushrooms
Cooking spray
2 cups chopped onion
3 garlic cloves, minced
1/3 cup all-purpose flour (about 1 1/2 ounces)
2 pounds lean beef stew meat, cut into bite-sized pieces
3/4 teaspoon salt, divided
1 cup dry red wine
1 tablespoon chopped fresh thyme
2 (14-ounce) cans less-sodium beef broth
1 bay leaf
2 cups (3/4-inch) cubed peeled white potato (about 1 pound)
1 1/2 cups (1-inch) slices carrot (about 12 ounces)
1/2 teaspoon freshly ground black pepper
Fresh thyme sprigs (optional)

Heat 1 teaspoon olive oil in a large Dutch oven over medium-high heat. Add mushrooms, and sauté for 5 minutes or until mushrooms begin to brown. Spoon mushrooms into a large bowl. Lightly coat pan with cooking spray. Add onion; sauté 10 minutes or until tender and golden brown. Add garlic; sauté 1 minute. Add onion mixture to mushroom mixture.
Place flour in a shallow bowl or pie plate. Dredge beef in flour, shaking off excess. Heat remaining 2 teaspoons oil in pan over medium-high heat. Add half of beef mixture; sprinkle with 1/8 teaspoon salt. Cook 6 minutes, browning on all sides. Add browned beef to mushroom mixture. Repeat procedure with remaining beef mixture and 1/8 teaspoon salt.
Add 1 cup wine to pan, scraping pan to loosen browned bits. Add thyme, broth, and bay leaf; bring to a boil. Stir in beef mixture. Cover, reduce heat to medium-low, and simmer for 1 hour or until beef is just tender.
Stir in potato and carrot. Simmer, uncovered, 1 hour and 15 minutes or until beef and vegetables are very tender and sauce is thick, stirring occasionally. Stir in remaining 1/2 teaspoon salt and pepper. Discard bay leaf. Garnish with thyme sprigs, if desired. Yield: 8 servings (serving size: about 1 cup)

Saturday, December 31, 2005

A Simple Supper


Tonight's dinner was very simple, but quite good. Hoisin and Honey Glazed Pork Chops was a super simple meal. The original source is Gourmet magazine, but the inspiration came from my Sister-In-Law Belle who asked if I had a recipe for such a thing. A brief search found several different sources of the identical recipe. This was a sweet sauce, and sort of threw Andy a little bit. In his defense, I ran out of dijon mustard and decided the honey mustard would be an okay substitute. Later I found the Chinese Mustard in the fridge- which proabbly would have made the best substitution. But the pork chops themselves were succulent, and plenty juicy. Fabulously so. They were perfectly done after 20 minutes of baking and about 6/7 minutes of broiling. I used a thick cut pork chop from my local butcher, and will definitely be buying their chops again. I served this up with plain rice, a light salad, and green beans. I will be keeping this recipe, as I really enjoyed the sauce. I think it would also make a great Asian inspired kabob- and would be incredible grilled.

I apologize for the quality of the food styling here. This will take some getting used to I think. :-)

Oops. Almost forgot to share the recipe:
* Exported from MasterCook *
HOISIN AND HONEY GLAZED PORK CHOPS


1 bunch scallions
1/4 cup Asian oyster sauce
2 tablespoons Dijon mustard
2 tablespoons hoisin sauce
1 teaspoon finely grated peeled fresh ginger
2 tablespoons honey
1 tablespoon soy sauce
4 pork chops (2 lb total) -- (1-inch-thick)
Accompaniment: cooked rice

Put oven rack in middle position and preheat oven to 400°F. Cut scallions diagonally into 2-inch pieces.
Whisk together remaining ingredients except pork in a large bowl. Add scallions and pork, turning pork to coat generously with sauce.
Arrange pork in 1 layer in a 15- by 10-inch shallow baking pan (1 inch deep). Spoon remaining sauce with scallions over pork and roast until just cooked through, 15 to 20 minutes.
Turn on broiler and broil pork 5 to 6 inches from heat until top is slightly caramelized, 2 to 5 minutes. Let stand, uncovered, 5 minutes. Serve pork topped with any pan juices. Serves 4.
Source: "Gourmet January 2004"


My Pride and Joy

My Abigail

My Zander


Ain't He Sweet


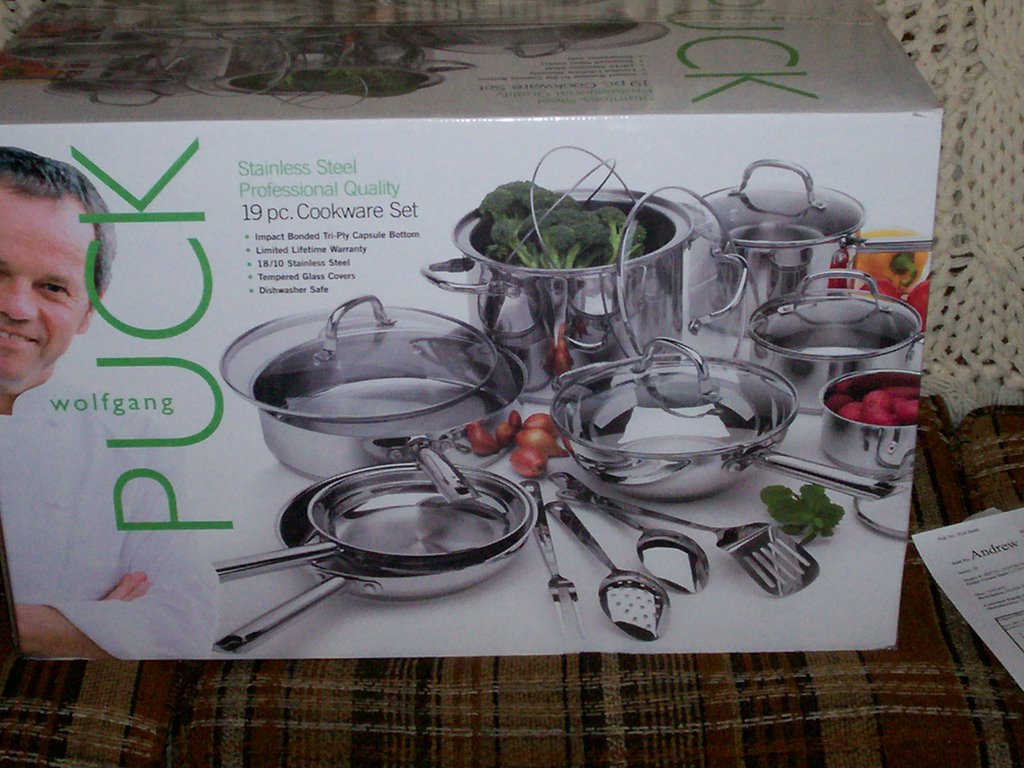
Andy was very sweet to me for Christmas. As you can see. There is a picture on my blog!!!!! Yeppers. My sweetie got me my digital camera. I can't wait to learn everything there is to know about my camera. I am really looking forward to experimenting, and being able to post pictures on my blog. Here in this photo you see my other gift. A set of Wolfgang Puck's cookware. I have really been in need of new cookware. The set we recieved for our wedding was fabulous at the time, but as any non-stick will do, they wore down and seriously needed replacing. I have been eyeing up these Wolfgang Puck pots and pans because they seem really nice. They have a very nice heft to them, are oven safe (including the lids!) and I equate Wolfgang Puck with quality. As I mentioned to Andy, I simply can't imagine this man putting his name and face on junk. So he bought me a set!!! Over the next few months we will add a few nice pieces of nonstick cookware as well, but this is a very good start- and very unexpected.

A little bit later on I am going to take some pictures of my kiddies to post on here as well. Likely they will be pictures of them enjoying their own Christmas spoils. :-)

Thursday, December 29, 2005

As promised...


I promised a recipe for Pierogi, and never returned to share it. Shame on me. I am back to share it now. This is the recipe that Andy's parents use, and I suspect have for years. The dough is very much like a pasta dough, and vry tough to knead, but it is worth the end results. According to Mom Waz, you can use the leftover pieces of dough to make noodles, or ball them up and reuse for more pierogi. I did the latter this time around. Although today I did find a ball of dough yet in the fridge that I forgot- and it obviously has a short life span. So make the pierogi in a few days time. These also freeze remarkably well. I believe Mom and Dad always freeze them after the cooking process, but I was thinking the other day that you could lay the stuffed pierogi on a baking sheet and freeze individually- and THEN freeze them in a bag or a Foodsaver bag. Then it would be a simple matter of tossing frozen pierogi into boiling water- very much like a frozen ravioli. I will give that a whirl next time.

Pierogi Dough
Yield: about 3 dozen

2 Eggs
1/4 tsp salt
4 TBS margarine, melted (I used butter)
4 Cups flour

In a small bowl, mix the eggs, salt, and melted margarine. Place flour in a large bowl. Add liquid to dough and mix until crumbly. Add enough water to form dough. (I doubled the batch and used about 4 cups of water.) Knead on a lightly floured surface for 10 minutes to make the dough smooth and elastic. Roll out a large piece and cut into 4 inch circles. Fill with about 2 Tablespoons of filling. Fold the dough circle over itself, making a half- circle. Pinch edges together and crimp with a fork. Place in boiling water for about 5 minutes until pierogi float to the top.

***I used my pasta roller for this task. Thanks to a tip from Mom, I was able to run the dough quickly through 3 different levels and had a nice sheet of dough to work with.

Now for the fillings. The key to the fillings is to make sure they are well-chilled. I made them 2 days ahead of time and kept them in the refrigerator. Now, a search for pierogi fillings brings up endless variations. I made three, but ended up eating two. The one that didn't turn out was a sauerkraut filling. Usually I love sauerkraut. I'm a good German girl and love the stuff. This... the recipe said to boil a can of sauerkraut and an onion for 1 1/2 hours. Then saute to remove moisture. Well, my logic said that sauerkraut is already well cooked and processes, so I just sauteed it with onion. Worked okay. Until I stuffed the pierogi with it. It just smelled like a horrible fishy something. I did not cook them up. I am guessing that the long boiling process helps remove that smell, because, boy, was it bad.

The two fillings I was successful with was a Potato and a Butternut Squash. I will start with the potato. Basically, I boiled about 4 cups of chopped potatoes, then mashing them. To the potatoes I added one onion that had been carmalized, a healthy glug of cream, salt, pepper, and cheddar cheese. These were very good. Next time though, I will leave out the cheese, I didn't notice it was in there. To serve these particular pierogi, I melted some Velveeta with some chopped broccoli, and poured the sauce over the pierogi. Yum! May not be traditional, but they were awesome. Andy's favorite though was the squash:

Start with one small to medium butternut squash. Cut lengthwise in half and remove the seeds. Season cut sides with salt and pepper and place face down in a baking dish. Pierce the squash several times with a knife. Add about 1/4 inch water to the pan, cover with foil, and bake at 350 for about 1 hour. Let cool until you can handle it. Remove the squash from the skin.

In a saute pan, saute one small onion in butter until translucent. Add one clove of garlic- minced. Saute for about another 5 minutes. Add a pinch of salt, pepper to taste, and a pinch of freshly ground sage. Add the butternut squash. Saute until the moisture has been cooked out of the squash (10-15 minutes). Chill completely. Add 1/4 cup freshly grated parmesan cheese before stuffing. This could also be used to stuff ravioli.

And how did I serve that one? Mmmm. I browned up a stick of butter and added about 1/2 cup walnuts to the butter and about 1/4 tsp. ground sage. Then I poured that over the pierogi. Wow. Heaven on a plate, that's for sure.

Overal the pierogi was not as time consuing as I had been expecting. They were delicious, and according to Andy, I can stuff them with just about anything I desire. So I fully intend on stuffing these with as many things as I possibly can. So I hope you try them, they really are very good and also very satisfying. They are almost a meal in themselves. And as the good Polish people would say: Smaczne! (Delicious)

Monday, December 26, 2005

Merry Christmas!!

Well, this has been a fantastic weekend! I don't know exactly where to start, but I will attempt somewhat to not write a novel this morning. :-) The weekend started for me on friday. Friday was an important day for me. I was to finish up some last minute shopping, clean the house, and prep things for our Open House. That was not to be. I was awake in the wee hours of the morning with a migraine, and really was incapacitated. My wonderful husband did what he could to get some cleaning done, but mostly he needed to occupy Zander and Abigail. Around 3 in the afternoon I was finally able to keep something down and quickly took some painkillers. An hour later I was at least able to mildly function. We headed over to Mom and Dad's for a pre-weekend family feast. It was great. It has been a long time since all my siblings and their respective counterparts were all together at one time. Even though I was still subject of a throbbing head, we were all able to enjoy the time together visiting and eating. It was very nice.

Saturday morning I HAD to finish my shopping. I was successful thanks to my children who wake nice and early in the morning. I managed to beat the crowds, and got exactly what I was after. Back home again presented me with a few options. I started with making a simple fruit salad and my cookie trays for Christmas Eve festivities at Mom and Dad's. After getting Zander down for a much needed nap, Abigail and I embarked on a Pulish tradition. Pierogi making. Let me tell you, the invention of the pasta roller has got to be the true joy of pierogi makers everywhere. The tradtional dough for pierogi is very elastic, a lot like a pasta dough. I could not imagine rolling it out by hand. Yikes. I had made my fillings earlier in the week, and Abigail was such a little helper, rolling the maker for me, and then stuffing the dough. She had so much fun with it, they may have to make an appearance more than once a year. I will share the recipe I used at the end of today's post, along with approximations for the fillings.

Upon Zander's awakening, we headed over to Mom and Dad's. We had a nice time visiting and eating, nd eating some more. Zander has developed a particular fondness for the men in the family. He absolutely adores his Uncle Buggy, and spent a good deal of the weekend climbing all over him. :-) But I do think all the boys in the house got adequate Zander time. After Church we all gathered around the Christmas tree for the big gift exchange. I just love watching people open gifts and seeing what everyone receives. I don't think there was a single gift opened that wasn't completely appreciated. One in particular... Pardon the happy sentimental moment, but the entire evening was capped off by a beautiful wedding proposal for my baby sister Lizzie. *sniff* It's going to be awhile before I stop getting choked up thinking about THAT. :-) So Uncle John is truly going to be Uncle John next August. We are all sooooooo happy for them and excited. I can't believe that both of my baby sisters are getting married next year.

Ahem. Well, Christmas morning started with a VERY excited Abigail waking us all up to see all the presents under the Christmas tree. Of course, we trudged down, started the coffee drip and began the celebration. We completely spoiled Abigail and Zander this year and so far it has been worth it. They are very happy with their gifts. So much so that they recieved some money gifts this year, and I think they may not exactly know what to purchase for themselves. What more can a Mom ask for than happy children. After the big gift opening the task of preparing the house for company began. Since I completely lost Friday I spent the early afternoon in a mad scramble to get everything done, while cutting some necessary corners. We did well. And were ready for company before they arrived. We weren't sure who would come. It was after all, an open house. It was wonderful. We had the unexpected guests, and the expected, and everyone came and stayed. We all just had a ncie time visiting and sharing Christmas. The munchies, and meal, and gobs of cookies and truffles kept everyone happy. We recieved a stunning gift basket from a dear friend of ours. It was so thoughtful. And full of fantastic foodie gifts that will be fun to explore. Part of me wants to dig in right away today and try a little bit of everything, but I think we will slowly savor the basket and disect each component itself. Today may very well be a cheese fondue made with a Lemon Artichoke Pesto. (How could that be bad!!) Or maybe it will be a presentation of Warm Gooey Camembert smothered in an Apple Confit made with Calvados. Or perhaps I will make up a batch of scones and somther them with a Pumkin Butter with Port. Wow. So many choices. :-)

Well, I have a daughter who is anxious for Mommy to join her in a rousing game of Guess Who. So I will be off, and I will be back later today to post the recipes for the pierogi.

Merry Christmas everyone!!!!!!!!!!!!

Wednesday, December 21, 2005

The Return of The Truffle...


Today I am returning to my happy place. The land of chocolate. You know the "Nerve Center" on Willie Wonka? The chocolate river, the room full of candy? That is my happy place. After deciding to stop the candy madness going on in my kitchen, I have returned to the one item that truly makes me smile. My Truffles. I am very proud of my truffles. It is a truffle center unlike any I have ever had. My secret? A whipping. Traditionally, a truffle is made with chocolate and whipping cream, creating a ganache. The ganache is chilled and rolled into balls. Well. I add butter, an egg yolk, and occasionally a flavoring before chilling. After chilling, my ganache gets beaten with a mixer until light and fluffy. Really, the tough part has been figuring out how to wrap it in chocolate. It is so soft and delicate, but I have figured it out, and today I am making two more varieties of truffle. I am making a plain jane chocolate truffle, and a sinful Mexican truffle that has been laced with a spicy cinnamon syrup and a sprinkle of Vietnamese cinnamon. I will share the recipe today, but be warned, it takes a bit to work with. It took me close to 10 years to get it right, so just have some patience. And yes, it was worth the wait.

* Exported from MasterCook *
Truffles

6 squares semisweet chocolate -- coarsely chopped
1/4 cup butter
3 tablespoons whipping cream
1 egg yolk -- beaten
3 tablespoons rum, brandy, coffee liquer, orange liquer, framboise, or whipping cream
chocolate for dipping

In a heavy 2 qt saucepan combine semisweet chocolate, butter, and whipping cream. Cook and stir over low heat until chocolate melts (about 10 minutes). Remove saucepan from heat.
Gradually stir about half of the hot mixture into the beaten egg yolk. Return the mixture to the pan. Cook and stir over medium heat until the mixture is slightly thickened. Remove saucepan from heat.
Stir in rum, brandy, liquer, or whipping cream. Transfer mixture to a small mixing bowl. Cover and chill until completely cool and smooth, stirring occassionally (about 1 1/2 hours).
Beat chilled misture with an electric mixer on medium speed until slightly fluffy (about 2 minutes). Chill till mixture holds its shape (15 minutes). Drop by well rounded teaspoonfuls onto a baking sheet lined with waxed paper. Chill until firm (about 30 minutes). Gently shape into balls. Chill again until ready to dip them.
Dip truffles, one at a time into tempered dipping cholcolate or confectioners coating. Let stand until coating is dry. Store tightly covered in a cool, dry place up to 2 weeks. Or freeze for up to 1 month.
**Alternately, you can roll truffle mixture into cocoa or finely chopped nuts

Tuesday, December 20, 2005

I'm finished with the almond roca.

Not funny.

Yet another attempt has produced a wierd sugary confection. I can only surmise that this time I undercooked the roca. I found the right pan, found the right burner, but apparently I missed the ball on the right thermometer. And of course, this batch is beautiful from the pan. Looks great, perfectly tempered chocolate scattered with crumbled toated almonds, it LOOKS fabulous. a nibble into the contents is sorely disappointing. The flavor is there this time, but the texture is way off. Glancing at the recipe, it seems that I accidentally omitted the 1/2 teaspoon of salt called for in the recipe, but I can't imagine that the salt affects much more than the flavor in this application. I could be wrong though...

So if you are one of the recipients of a package containing Almond Roca, enjoy it. It's all I am making this year, because it breaks my heart dumping out batch after batch of almonds, butter, and sugar. I have enough almonds yet to try a half batch- and I may do that, but mostly, the Candy Gods are not smiling on me. I think I will stick with the truffles while I am on a roll with the chocolate.

On a positive note, I managed to make one of Andy's favorite cookies today without incident. Greek Honey Nut Wedges combine the Greek favorites of lemon, cinnamon, and honey, and wow, do they make a good cookie. This is a recipe I got from a Better Homes and Garden's Holiday Cookie issue years ago. I actually make mine smaller, so I divide the dough into 8 portions instead of the 4 suggested in the recipe. Then I cut each round into 8 pieces instead of 12.

* Exported from MasterCook *
Greek Honey-Nut Wedges

1 package cream cheese -- (8 oz.) softened
1/2 cup butter ( no substitutes) -- softened
2 TBSP. sugar
2 TBSP. milk
2 cups all-purpose flour
2/3 cup sugar
1 1/2 tsp. ground cinnamon
1/3 cup honey
2 TBSP. lemon juice
2 cups finely chopped walnuts
milk
1 TBSP. sugar
1/8 tsp. ground cinnamon

Beat cream cheese and butter on medium-high speed for 30 seconds. Beat in 2 TBSP.sugar and 2 TBSP. milk till combined well. Beat in as much of the flouras you can with the mixer. Stir or knead in any remaining flour.Divide dough into four portions. If necessary, cover and chill for 1-2 hours or tilleasy to handle.Meanwhile...combine 2/3 cup sugar ,1 1/2 tsp. cinnamon,the honey and lemon juicein a mixing bowl. Stir in chopped walnuts ; set aside.
Roll one portion of dough on a lightly floured surface into an 8" circle.Carefully transfer to a cookie sheet to an ungreased cookie sheet. Spread halfof nut mixture on top to within 1/2" of edged of circle.Roll another portion of dough into an 8" circle. Place this one over the topof the nut covered circle.Seal edges with a fork. Brush the top with milkand sprinkle with the combined 1 TBSP. sugar & 1/8 tsp. cinnamon.Repeat with remaining dough and filling.Bake in a preheated 350 F.oven for 15-20 minutes or till edges start to brown. Cool on cookie sheet for 10 minutes. Cut each round into into 12 wedges.( a pizza cutter is great for this ) Transfer to wire racks to cool completely.Makes 24 pieces.

NOTES : 1/3 Less Fat Cream Cheese works just as well as full fat for this cookie.

Monday, December 19, 2005

Time flies...

And just like that it's been a dew days since I last posted. I've been a bit busy. Not quite as I want to be, but busy nonetheless. I've made a few things in the kitchen, but nothing super noteworthy...Hmm...I don't think that's right, but I'll get back to that. I attempted to make spritz cookies this weekend, but the darned cookie press was not cooperating. I must have spent an hour trying to press out little wreaths and Christmas trees before I threw the thing across the room and grabbed the rolling pin. I ended up rolling out those cookies, and cutting them out with mini cutters. They turned out cute, but I know I overworked the dough wrestling with it, so they were not very tender. But that's okay, they were for a church function anyway.

Ah yes.

Jam Thumbprints.

Crumbly little bites of buttery sweet shortbread, wrapped in toasted coconut and finished off with a tiny morsel of apricot sweetness. That Ina Garten sure knows what she is doing in the kitchen. The recipe calls for apricot or raspberry preserves, and in the past I've tried them all, and the apricot really is best. Although for a color contrast I used blackberry this year, and they are almost as good, so that works for me. These may well be my favorite Christmas Cookie. (Course, I say that about every cookie.)

And today I tried another recipe that Joe shared over at Culinary In The Desert. That Joe could easily become my best friend of he keeps it up. Peanut Butter Filled Chocolate Cookies are the perfect blend of chocolate and peanut butter- with the bonus that they are really fun to eat. These unassuming little chocolate domes give way to reveal a center of meltaway peanut butter. They were much easier to make than I thought they would be, and I have to give them a huge thumbs up. They are definitely going on my cookie platters. Joe tweaked a BH&G recipe for a caramel chocolate cookie, and I am anxiously awaiting his nect "tweaking". Keep it up Joe!

So here are the recipes for The Peanut Butter Filled Chocolate Cookies, and the Jam Thumbprints. Enjoy!

* Exported from MasterCook *
Peanut Butter filled chocolate cookies

1 1/2 cups flour
1/2 cup dutch cocoa powder
1/2 teaspoon baking soda
1/2 cup butter -- softened
1/2 cup granulated sugar
1/2 cup packed brown sugar
1/4 cup peanut butter
1 egg
1 tablespoon milk
1 teaspoon vanilla
Peanut Butter Filling
3/4 cup sifted confectioners' sugar
1/2 cup peanut butter
2 tablespoons granulated sugar

Preheat oven to 350
Sift together the flour, cocoa powder and baking soda in a medium bowl.
In a large bowl beat together butter, 1/2 cup granulated sugar, brown sugar and 1/4 cup peanut butter until well combined. Add egg, milk and vanilla. Beat well. Gently mix in the flour mixture about 1/3 at a time until incorporated. Form the chocolate dough into 32 balls.
For the filling
Combine confectioners' sugar and 1/2 cup peanut butter in a mixing bowl and beat until smooth. Form into 32 balls.
Working on a silpat or parchment, gently flatten each chocolate ball. Top with peanut butter ball. Carefully fold chocolate dough over the peanut butter ball and seal the edges. Roll dough into a ball.
Place balls on a parchment lined baking sheet. Lightly flatten with the bottom of a glass dipped in 2 tablespoons granulated sugar.
Bake cookies for about 8 minutes,until the surface begins to slightly crack. Let cool for 1 minute on the sheet. Transfer to wire racks and cool completely

* Exported from MasterCook *
Thumbprints

3/4 pound unsalted butter -- (3 sticks) at room temperature
1 cup sugar
1 teaspoon pure vanilla extract
3 1/2 cups flour
1/4 teaspoon kosher salt
1 egg beaten with 1 tablespoon water -- for egg wash
7 ounces sweetened flaked coconut
Raspberry and/or apricot jam

Preheat oven to 350 degrees F. In an electric mixer fitted with the paddle attachment, cream together the butter and sugar until just combined, and then add the vanilla. Separately, sift together the flour and salt. With the mixer on low speed, add the flour mixture to the creamed butter and sugar. Mix until the dough starts to come together. Dump on a floured board and roll together into a flat disk. Wrap in plastic wrap and chill for 30 minutes.
Roll the dough into 1 1/4-inch balls. (If you have a scale, they should each weigh 1-ounce.) Dip each ball into the egg wash and then roll it in coconut. Place the balls on an ungreased cookie sheet and press a light indentation into the top of each with your finger. Drop 1/4 teaspoon of jam into each indentation. Bake for 20 to 25 minutes, until the coconut is a golden brown. Cool and serve.

Wednesday, December 14, 2005

Christmas goodies...here I come!

Despite having a daughter home from school ill, I had a nice productive day in the kitchen. Tried some new winners and made some classic tried and true recipes. I started by making a batch of Eagle Brand fudge. As much as I love real homemade stirred fudge, I just love the creaminess of the Eagle Brand fudge, and I have to have it. It also is a no-brainer, and a no-timer, as it comes together in under 5 minutes. You just can't beat that. The recipe?

1 can sweetened condensed milk
18 oz. chocolate chips
1 teaspoon vanilla
1 cup chopped walnuts, if desired.

Combine the condensed milk and chocolate chips. Microwave for 1:30-2 minutes. Stir until melted. Add vanilla. Stir. Stir in nuts. Pour into a greased 8x8 pan and let cool completely. Cut into squares and enjoy.

Then I tried a new recipe from Emeril. A super easy recipe, actually. It is for Emeril's Coconut Indulgences. Wow. If you like a Mounds bar, you have got to try this one. It is identical! I plan on making a second batch and topping each ball with a whole almond. They are really addicting! I quickly had to package them up and plce them in our garage so that I stay away from them. Yum. I will post the recipe at the bottom.

I also made another batch of the Lime Meltaways I shared earlier. Still good. Except that before I sliced them for baking, I rolled each log in green sugar to trim the edges. It just adds a little bit of color to them, and looks really festive. I'm very happy with the,

Next up I tried a new recipe for Chocolate Mint Pinwheels. I have a confession. I have never made a pinwheel cookie, or a slice and bake cookie. This combined both of them, and I am super happy with the results. It is a gorgeous cookie. The 1/4 teaspoon of green food coloring is a lot, but the green really comes through and is a beautiful contrast with the chocolate dough. I am also very happy with the flavor. I admit that they were not good hot out of the oven (I just can't resist). So I was worried. However, once they cooled, I tried again. They are a perfect minty cookie. I really don't like minty treats that are overly sweet. I like mint, but I don't want it to stick to the back of my throat. Yuck. These cookeis have that crisp peppermint flavor, and there is just a hint of the chocolate. I guess the chocolate relly doesn't come through much, but I do wonder if using a dutch process cocoa instead of regular would increase the chocolate flavor. I must make a note of that. This one is a winner.

Well, here's two recipes for today, and I must dash. Sausage and peppers are begging to be made, so I must acquiesce.

* Exported from MasterCook *
Chocolate Mint Pinwheels
Serving Size : 48

1/2 cup shortening
1/2 cup butter
1 cup sugar
1 egg
2 Tablespoons milk
1 teaspoon vanilla
2 3/4 cups all-purpose flour
1/2 teaspoon baking powder
1/4 teaspoon salt
1/2 teaspoon peppermint extract
1/4 Teaspoon green food coloring
1/4 cup unsweetened cocoa

In a large mixing bowl, beat shortening and butter with an electric mixer on medium to high speed about 30 seconds or until softened. Add the sugar and beat until fluffy. Add the egg, milk, and vanilla. Beat until thoroughly combined, scraping the sides of the bowl occasionally. Divide mixture in half.
In a medium bowl, sift together the flour, baking powder, and salt. Into one portion of the shortening stir 1 1/2 cups flour mixture, mint extract, and food coloring. Stir the cocoa powder into the remaining flour mixture. Add cocoa mixture to the remaining shortening mixture and mix well.
Place each portion bewteen 2 sheets fo wax paper. Using a rolling pin, roll each portion into a 12x11 inch rectangle. Invert the green dough on top of the chocolate dough. Peel off top sheet of paper. From a long side, roll up jelly roll style, removing wax paper as you roll. Cut roll crosswise in half. Wrap each half in waxed paper and chill for 4 to 48 hours.
Cut chilled douhg into 1/4 inch thick slices. Place 2 inches apart onto an ungreased cookie sheet.
Bake in a 375 oven for 10 minutes or till edges are firm and bottoms are lightly browned. Cool on wire racks.
Source: "BHG Cookies Cookies Cookies" - - - - - - - - - - - - - - - - - - -

* Exported from MasterCook *
Emeril's Coconut Indulgences

5 ounces condensed milk
1 cup powdered sugar
1 teaspoon vanilla extract
1 package sweetened flaked coconut -- (14-ounce)
3 cups semisweet chocolate chips

In a large bowl, combine the condensed milk, powdered sugar, and vanilla extract. Stir well until thoroughly incorporated and smooth. Add the coconut and stir well to combine. With a tablespoon, scoop out portions of the candy mixture onto a baking sheet. With wet hands roll the candies into rounds. Refrigerate until firm, about 1 hour.

In the top of a double boiler or metal bowl set over a pot of simmering water, melt the chocolate chips. Pour the chocolate into a shallow bowl and, using 2 forks or toothpicks, dip the coconut balls into the chocolate and roll to coat completely. Shake off the excess, and place on a rack set over a baking sheet covered with waxed paper. Repeat with the remaining candies and let air dry, or refrigerate to harden.

Monday, December 12, 2005

Progress Today!


You know what I love about the holidays? Thinking about people. Thinking about all the family and friends that I have, and thinking about those who have moved on. It was so exciting to hear from my cousing Joe this morning, that I just got right into the holiday spirit. I've had a bit of a lift in my toes today. So thanks Joe for your inspiration!!

I fixed my strange pumpkin fudge. Today I picked up a block of white confectionary coating to dip the fudge in. I really like the way confectionary coating handles. The flavor isn't spectacular, but it makes a classy looking candy. And let me tell you. That punch of sweetness was exactly what the pumpkin fudge needed. Seriously. I had already decided to toss the pumpkin fudge recipe. Now I am thinking that the fudge has been deemd "Christmas Plate Worthy". So I am very happy about that. And as long as I was dipping fudge, I grabbed a bag of pretzels and dunked some pretzels. I added some green and red sprinkles, and Abigail will be very excited when she gets home from school. I have to see if I can find those Christmas tree pretzels for the Open House...

I also just took a pan of Cranberry Pecan Bars out of the oven. They smell fabulous. I hva enever made them before, but when I was looking at my goodie list, I realized it was very short on cookies and bars- more candy and chocolate than anything. So I grabbed a classic cookbook that I have never cooked from BHG Cookies, Cookies,Cookies. This is a cute book it has two sides to it. One side is regular cookies, and then you flip the book over and it has Christmas cookies. A little cheesy, but cute. The first ones that jumped out were these ones, and the big question was the cranberries...would I have enough? Just. The only change I had to make was with the crust. It just didn't seem to me like it would hold together, so I added 3 more tablespoons of butter to the curst before I had a consistency I was happy with. And like I mentioned, these smell divine. I also have a pork roast in the crockpot melting away, so the combination of roasted pork and baking cranberries and orange, oh my. My house smells incredible right now.

Up next, I think will be some Gingersnaps. I think that will nicely round out the scent-a-thon going on in my house. :-) Here is the recipe for the Cranberry Pecan Bars, I will share the Gingersnap recipe when I decide which one to make...

* Exported from MasterCook *
Cranberry Pecan Bars

Serving Size : 36

1 cup all-purpose flour
2 Tablespoons sugar
1/2 cup butter -- or margarine
1/2 cup pecans -- finely chopped
1 1/4 cups sugar
2 Tablespoons all-purpose flour
2 whole eggs -- beaten
2 Tablespoons milk
1 Tablespoon orange peel -- finely shredded
1 teaspoon vanilla
1 cup cranberries -- chopped
1/2 cup coconut
1/2 cup pecans -- finely chopped

For Crust: In a medium bowl combine the 1 cup flour and 2 tablespoons sugar. Using a pastry blender, cut in the butter until it resembles coarse crumbs. Stir in 1/2 cup pecans. Press flour mixture into the bottom of an ungreased 9x13x2 pan. Bake in a 350 oven for 15 minutes.
Meanwhile, in a large mixing bowl, combine remaining sugar and flour. Stir in the eggs, milk, orange peel, and vanilla. Fold in cranberries, coconut,and pecans. Spread over partially baked crust. Bake in a 350 oven for 25 to 30 minutes more, or until top is lightly browned. Cool in pan on a wire rack. While still warm, cut into bars. Cool completely. Makes 36.
Source: "BHG Cookies, Cookies, Cookies" - - - - - - - - - - - - - - - - - - -
Per Serving (excluding unknown items): 96 Calories; 5g Fat (48.0% calories from fat); 1g Protein; 12g Carbohydrate; 1g Dietary Fiber; 17mg Cholesterol; 30mg Sodium. Exchanges: 0 Grain(Starch); 0 Lean Meat; 0 Fruit; 0 Non-Fat Milk; 1 Fat; 1/2 Other Carbohydrates.
Nutr. Assoc. : 0 0 0 0 0 0 0 0 0 0 0 0 0

Sunday, December 11, 2005

Foodie Blog Updates

Recently I've been expanding my "daily visit time" in the world of Foodie Blogging. It's kind of fun how you click on one link and then another, and see where you end up. I have found quite a few food blogs that are both enjoyable to read, as well as beautiful to look at. So I am adding a number of them to my sidebar, if you haven't checked them out, please do so. Makes me realize I really need to get on the ball and learn the whole photography thing. Hopefully soon I will get to work on that. :-)

That's it for today, sorry to say. This week promises to be busy in the kitchen whipping up the necessary goodies for our Christmas Open House on Christmas Day, so wish me luck! I will be certain to share my successes with everyone.

Friday, December 9, 2005

Interesting fudge...


Hmm... I can't say that I am in love with the pumpkin walnut fudge I made yesterday. It did turn out well, and it is good. But, well, it has this squashy flavor to it. Mind you, I LOVE squash. I had a huge bowl of plain squash today for lunch, actually. But in fudge? I dunno. I guess I was expecting it to be reminiscent of pumpkin pie, but I suppose maybe I shoul dhave made Pumpkin Pie fudge then? This doesn't have any pie spices or anything, just squash, milk, and sugar basically. I am thinking that I will cut up the batch I have into squares and give them a bath in some white chocolate. A sweet as fudge is, I think this is one flavor that could benefit from the addition of something sweet. I will post the recipe below if anyone is interested.

Nothing else new in the kitchen today. Zander and I spent a little time out shopping today and realized with absolute horror that the one item Abigail has specifically asked for for Christmas is the "must-have" toy that every single store is out of. No problem right? This is the age of the internet. Unless everyone online is sold out. Two days ago I put one in my shopping cart at Amazon. Today I went to check out, and boom, sorry unavailable at this time. What's up with that. I tried all the major retailers, Shopzilla, Overstock, and finally found one on Ebay. By the time you add shipping, I had to pay double, but this is the forst time Abigail has ever gone on and on about a specific toy for Christmas. All her friends have one already, and when I ask her what else she wants she says "I don't know Mommy." So I'm very glad I found one on Ebay. It will be worth every penny.

And Andy just called on his way home from his work Christmas party. Seems his name was drawn for Packer tickets! To this Sunday's game against Detroit! So he is very excited about that one. He was working on calling his "Packer Buddy" to make arrangements. And why won't I go you ask? Well, I would love to go to a Packer game sometime. But. I am so not a cold weather person. Game in September? Maybe I'd go. But you couldn't drag me to a cold weather game if you paid me. Yuck. Anyways, they will go and have a blast, and Andy will have this crazy grin on his face for a few weeks, so that will be good as well.

So here is the fudge recipe. Andy brought home more cheese today which we will sample tomorrow and review with earnest on the Cheese Blog. So until then- good night all!

* Exported from MasterCook *
PUMPKIN WALNUT FUDGE

4 cups sugar
1 cup milk
3 tablespoons light corn syrup
1 cup fresh pumpkin puree or canned pumpkin puree
3 tablespoons unsalted butter -- cut into bits
1 teaspoon vanilla
2 cups chopped walnuts

In a 4-quart heavy saucepan combine the sugar, the milk, the corn syrup, the pumpkin puree, and a pinch of salt, cook the mixture over moderate heat, stirring, until the sugar is dissolved, and cook it, undisturbed, until a candy thermometer registers 238°F. Remove the pan from the heat, add the butter (do not stir it into the mixture), and let the mixture cool until it is 140°F. Stir in the vanilla and the walnuts, beat the mixture with a wooden spoon for 30 seconds to 1 minute, or until it begins to lose its gloss, and pour it immediately into a buttered 9-inch-square pan. Let the fudge cool until it begins to harden, cut it into squares, and let it cool completely. The fudge keeps, stored between sheets of wax paper in an airtight container, in a cool place for 2 weeks.
Makes about 2 pounds.
Source: "Gourmet October 1991" - - - - - - - - - - - - - - - - - - -

Thursday, December 8, 2005

All better


I do apologize for the rant earlier today. I was not happy. Fortunately though, I think I have redeemed myself, and things are looking up. My almond roca still isn't quite right, but at least it is good. It doesn't quite have that buttery lightness that I associate with the roca. Instead it is a little darker, and more like an almond toffee. Similar, but enough difference to make it, well, different. I will have to try more, but this will b eokay for something.

I also successfully made a batch of Maple-Walnut Fudge. I love this fudge. It is very easy and very delicious. I will post the recipe at the bottom. The best part is that it doesn't call for a thermometer- which I am a little leery of right now. Just simmer your ingredients, mix and pour. I found the maple flavoring at a local dry goods store, but I think you could use a maple extract if that's all you can find. It is a cooked brown sugar fudge, so it has that slight crumbly texture that I love about cooked fudges.

I also have a batch of Pumpkin Walnut Fudge cooling on the stove. It's too soon to say it was a success, but so far it's looking good. I was able to use my back burner to some success, and I used my probe thermometer, and that seemed to work okay. I just have to come up with a way to hang the probe on my pan. At least I did not come up with a scorched black mess like I did the last time I attempted this fudge. It smells good, and I'm looking forward to sampling it. Right now it is coolin gdown to temp, and then I will beat in the walnuts and it should set up soon. I will report tomorrow on the success or failure.

So here are the recipes for both the Maple Walnut Fudge and the Almond Roca. The maple fudge is complements of Valchemist on the CLBB and the roca is from Anna at Cookie Madness.
* Exported from MasterCook *
Anna's Almond Roca

2 Cups Sugar
1 Pound Butter -- (4 sticks)
1 Cup Water
1/2 tsp. Salt
3 Cups Almonds -- the "shaved" kind
1 tsp. Baking Soda
1 bag milk chocolate chips

Reserve 1 cup of the almonds and set aside. Mix sugar, butter, water, and salt in large, heavy saucepan and heat to boiling over medium to medium high heat. Make sure there's room in the saucepan for the mixture to foam up and boil. Heat mixture over medium to medium high until it foams and reaches 240 degrees on a candy thermometer (don't stir). When temp reaches 240, stir in 2 cups of almonds. Stir mixture constantly and watch temp carefully until temp reaches 290. Remove from heat, stir in soda and QUICKLY pour onto a cookie sheet covered with buttered or greased wax paper. Mixture should start to harden immediately. As mixture hardens, sprinkle chocolate chunks over hardening mixture and spread the chocolate chunks around until they melt. Sprinkle melted chocolate with reserved almonds. Let sit until toffee hardens and chocolate sets.
- - - - - - - - - - - - - - - - - - -
* Exported from MasterCook *
Perfect Maple Walnut Fudge

2 cups packed brown sugar
5 oz evaporated milk
1/2 pound butter
2 cups powdered sugar
1 cup walnuts
1/2 teaspoon vanilla
1/2 teaspoon maple flavoring

Butter a 9x13-inch pan and set aside. (9x13 will produce very thin fudge. use a smaller pan if you like thicker pieces.) (I used an 8x8 pan for the perfect thickness) Lining the pan with foil or paper and buttering that makes cutting and removing much easier.
n a medium saucepan, combine sugar, butter and milk. Bring to a boil over medium heat. Reduce heat very slightly and boil 10 minutes while stirring constantly. No longer! (I didn't stir constantly. I was fairly good about it, but I left it every now and then and that turned out to be ok.)
Remove from heat and add powdered sugar, vanilla and maple flavoring. Mix thoroughly with hand mixer on medium until thick and glossy - just a couple of minutes. Fold in walnuts and pour in prepared pan.
Note: This recipe also doubles easily. For thicker fudge double and still use the one pan.
Source: "shared by Valchemist on CLBB"

You see? The comsumptives plot against me. "Will Shakespeare has a play, let us go and cough through it."


It's a plot. :-( Where are those angry eyes when I need them. Today I picked up a cheap candy thermometer so I could attempt my almond roca again. I fear there will not be much candy coming from my kitchen this year. (More angry eyes!) I think it is mostly the fault of my stove. Stupid coil electric stove and it's darn uneven heating. Yeah. Before my eyes I watched one half of my almond roca mixture carmalize and brown before it was supposed to, while the other half of the pot remained a bubbly yellow white and the thermometer was creeping slowly- and still a full 10 degrees shy of its mark. I tossed in my almonds early and started stirring like crazy. Again, that familiar smell of burnt sugar, and a toss in of my probe thermometer on the "darker" half called my time up. I poured it into my sheet pan and ran cold water under my spoon to check for a burnt taste. Thankfully, it does not taste at all burnt, but I am afraid the texture may have suffered. Almond Roca has a delightfully crunchy texture that is perfectly crumbly when bitten. I am afraid mine will have a little more chew. Likely from the not quite cooked enough roca mixing with the overcooked roca.
Grr... I am not happy. I am possibly going to attempt a fudge making later this afternoon, and I will try the other large burner, to check for accuracy.

And that sound coming from the kitchen just now was my son Zander, with a cold, proceeding to pour himself a full bowl of Rice Krispies. He missed the bowl. :-( Where are those darn angry eyes!!!!!

Wednesday, December 7, 2005

Feeling a little green


Sort of.

I am feeling a little under the weather today, but it is just a cold so far, and more annoying than anything. I'm feeling alittle woozy, but I'm almost positive that's the medicine I've taken to stop the flow of traffic coming out of my nose. (I know, TMI)

No, actually, the green feeling is coming from breakfast this morning. I discovered a new tea from Stash this week, and I am so enjoying it. It is an Irish Breakfast Blend, and is most definitely a robust tea. It is a very warming and comforting tea, and packed with flavor. I can just imagine that it would be perfect on a chilly winter night in Ireland. Oh wait, it's chilly and wintery here. To accompany this lovely tea this morning I have a great bowl of porridge. Real porridge made with Irish Oats. Yum. If you are an oatmeal fan, and have never tried Irish cut oats (or steel cut) you are truly missing a treat. It has such fantastic flavor, and the texture. Oh, the texture is a perfect balance between creamy and chewy. If you haven't tried it, you really should. Just a tiny sprinkle of sugar and a drizzle of milk complete a perfect bowl of porridge. (Although I did eye up the cream this morning.) They do take a little longer to cook- 20 minutes to perfection, but so worth it.

And while I'm raving about new products I like, I have to tell everyone that they really need to use Reynold's Release foil for their holiday baking. Wow, literally everything just slides right off- including burnt almond roca! I usually use parchment paper, but I hate using it off those rolls. The paper always curls up and is annoying to work with. The Release foil stays where you put it. And it's reusable. I lined a baking sheet for cookies and made cookies on some of the foil. I made an entire batch of cookies using that one sheet pan covered with the same sheet of foil. I will admit that I was skeptical at first, but the stuff works like magic. You also don't need to coat it with anything. So candies like roca and toffee that need a buttered pan can skip the buttering step. And that means the outside of the candy will not be greasy. I really love that. I hate biting into a piece of homemade toffee and my teeth slide before the snap.

So with that, I will sign off, most liekly for the day. I will take the day off from baking and creating, as I don't want to add a dose of germs to my goodies. So everyone have a great day!

Tuesday, December 6, 2005

Truffles, Truffles, Truffles


Guess what I made today?

Mmmm. Truffles. Today is the day that I REALLY wish I had that digital camera that Santa should be bringing. I have truly mastered the truffle, and this year I have taken them a step further and have started adding my own stringer. For the non-chocolatiers, a stringer is a mark in the chocolate that identifies the chocolate to the maker. My bittersweet chocolate truffles have a bumpy stringer. My thought there was that it is an intense chocolate not for the cautious- much like a porcupine. :-) I also made a raspberry truffle today. After an enrobing in dark chocolate they got a pink drizzle to identify them as raspberry. The raspberry ones are new to me. I picked up a bag of raspberry chips and thought this would be a perfect time to try them. They turned out nice, and I am very happy with them.

I love playing with chocolate. My truffle centers are so soft, they literally melt upon hitting the chocolate, so it took a few years to master the dipping process. It starts with perfectly tempered chocolate. I had tried rolling them in chocolate, and that melts the truffle. I tried a double dipping, where I dipped the bottoms and then poured the chocolate over the top. That worked okay, but was a little awkward. Last year, I figured out that the best tools for dipping chocolate are my hands. After my chocolate is tempered, I scoop up a handful of chocolate into my left hand. I grab a truffle with my right hand and pop it onto that chocolate blob. Then I use my right hand to scoop up the enrobing chocolate. My hands cool the chocolate just enough that it adheres to the truffle instead of melting it. It's so fun. One of my favorite movies is Chocolat, and I feel like I am in my own little French village when I play with chocolate.

So I'm feeling good today. Truffle making always puts me in a happy place. I need to figure out what I want to make for dinner tonight, but really, it doesn't matter because I am in a chocolate Nirvana. :-) So at that, I will sign off for today. I will be back tomorrow with another day of sugar.

Monday, December 5, 2005

Do you smell that?


Ah, the smell of Christmas. The smell of cookies baking in the oven, the smell of freshly zested lemon and lime, and the smell of almonds, butter, and sugar carmalizing to a burnt crisp on the stove. :-(

Today I went to pick up a whole cartful of goodie ingredients. And first off I was dying to make the first batch of Almond Roca. Ever since it came into my life two years ago, it has made the number one most requested gift from my family members. The recipe is courtesy of Anna of Cookie Madness, she first brought it to my attention tow years ago on the CLBB, and it has had a home ever since. So I put my ingredients into the pot and started the process. As I was watching the thermometer, I was reminded of a recent batch of horribly burnt pumpkin walnut fudge and thought I had better check my thermometer. So I took my probe and dipped it in the carmalizing goo. Yep, right on. Okay, took out the probe and continued. A while later I definitely started to smell a burnt smell. I was already stirring like a madwoman, and there was no sign of anything darkening, so I just ignored it and thought I had dribbled a little. So I am watching the thermometer, and realizing I have a ways to go before I hit 290, and I am starting to think that that burnt smell is the Almond Roca. All of the sudden, I swear the devil is in the kitchen himslef and has cast a smell because the smoke starts rolling out of the pot!! What the...So I pull it off the heat and check with my probe. That darn candy thermometer IS broken. I am not happy. I ruined my first batch of almond roca (not a good sign for things to come), my NEW candy thermometer sucks, and I have a very very black bottomed pot. Grr.

However, there are also two bright spots to the afternoon, courtesy of Martha Stewart. I tried two new cookie recipes today, and I am very happy with one, and the other is a WOW. The WOW cookie is called a Lime Meltaway. Yum. It is a very small, crumbly cookie about the size of a quarter. It is filled with lime zest and flavor, and then the whole thing is wrapped in a melty powdered sugar layer. They literally do just melt away. And they have such an intense lime flavor. Yum. Did I mention- yum?

The second cookie is a Double Chocolate Coconut Cookie. This one was also very good- especially for the ease of a drop cookie. It will get many repeats here, I'm just not sure it's at Christmas Cookie caliber. For sure it will need a white chocolate drizzle if it intends ot get on my cookie platters. But as I am on the hunt for some new variatuons of cookies, this one may juts do the trick. If nothing else, it is a great quick cookie, a much needed change from the chocolate chip and oatmeal raisin I tend to favor. So here are the cookie recipes, and I will share the almond roca recipe later, once I have made a good batch, that only seems fair.

* Exported from MasterCook *
Double Chocolate Coconut Cookies
Recipe By :Serving Size : 60
1 cup unsalted butter -- (2 sticks) softened
1/2 cup granulated sugar
3/4 cup packed light-brown sugar
2 large eggs
1 teaspoon pure vanilla extract
1 3/4 cup all-purpose flour
1/4 cup unsweetened Dutch-process cocoa powder
1 teaspoon baking soda
1/2 teaspoon baking powder
1/2 teaspoon coarse salt
2 cups white-chocolate chunks (about 9 oz)
1 3/4 cup sweetened flaked coconut
1 3/4 cups coarsely chopped walnuts (about 6 oz)

Preheat oven to 350 degrees F. Put butter and sugars in the bowl of an electric mixer fitted with the paddle attachment; mix on medium speed until smooth, about 2 minutes. Mix in eggs, one at a time. Stir in vanilla.
Sift flour, cocoa powder, baking soda, baking powder and salt into a medium bowl. Mix into butter mixture on low speed until well combined. Stir in chocolate, coconut and walnuts.
Using a 1 1/2-inch ice cream scoop, drop batter onto baking sheets lined with parchment paper, spacing 2 inches apart. Flatten slightly. Bake until set, 10 to 12 minutes. Let cool on sheets on wire racks 2 minutes. Transfer cookies on parchment to racks to cool completely. Cookies can be stored in airtight containers at room temperature up to 1 week.
Source: ""Martha Stewart Holiday Cookies, 2005"" - - - - - - - - - - - - - - - - - - -

* Exported from MasterCook *
LIME MELTAWAYS

3/4 cup unsalted butter -- (1 1/2 sticks) room temp.
1 cup confectioners' sugar
2 tablespoons freshly squeezed lime juice -- plus grated zest of 2 limes
1 tablespoon pure vanilla extract
1 3/4 cups plus two tablespoons all-purpose flour
2 tablespoons cornstarch
1/4 teaspoon salt

1. In the bowl of an electric mixer fitted with the whisk attachment, cream butter and 1/3 cup sugar until fluffy. Add the lime juice, zest, and vanilla; beat until fluffy.
2. In a medium bowl, whisk together flour, cornstarch, and salt. Add to butter mixture, and beat on low speed until combined.
3. Between two 8-by-12 inch pieces of parchment paper, roll dough into two 1 1/4 inch diameter logs. Chill at least one hour.
4. Heat oven to 350 degrees F. Line two baking sheets with parchment. Place remaining sugar in a resealable plastic bag. Remove parchment from logs; slice into 1/8 inch thick rounds. Place rounds on sheets, spaced 1 inch apart.
5. Bake until barely golden, about 15 minutes. Transfer cookies to a wire rack to cool slightly, 8 to 10 minutes. While still warm, place cookies in the sugar-filled bag; toss to coat. Bake or freeze remaining dough. Store in an airtight container up to 2 weeks.
Source: "Martha Stewart Living Mag. Dec 98/Jan 99 issue"Yield: "10 dozen" - - - - - - - - - - - - - - - - - - -

Saturday, December 3, 2005

Sharing something new!


I'm excited about this. Andy and I have really been enjoying cheese as of late. We have a fabulous store nearby called Nala's Fromagerie. It is a wonderful little store with quite the selection of world cheeses. They also have a beautiful selection of artisanal cheese, but mostly we have been discovering the different world cheese. There also happens to be a gorgeous wine shop next door, so conveniently we pick up a bottle of wine on occasion as well.

Anyway, Andy and I have been keeping track of the cheeses we have been exploring, and I thought it would be fun to share. So I have created a new blog called Cheese, Glorious Cheese. You can see the link on my sidebar. It will be devoted to cheese, and possibly wine to accompany the cheese. There may also,on occasion, be a recipe that stars or features a particular cheese. Andy will also be joining me in this adventure, so sometimes, you may even get to share in his point of view as well. I can't promise that we will post often, but when we happen to try a new cheese, we will certainly share about it. One of our goals for the new year is to become cheese connoisseurs, so we have a lot of work ahead of us, but it should be delicious! I hope you join us in the great cheese adventure!

Friday, December 2, 2005

There's something fishy going on!


No, seriously. :-) Today I found fresh catfish fillets at my local grocer. They look nice and firm and pink, and well, I have a weakness for catfish. The single best thing the fish industry could have done was farm raise catfish. I just love the intense flavor of catfish, paired with that meatiness you don't normally associate with fish. Catfish is great grilled, fried, broiled, baked, blackened, stuffed into tacos, smothered in cream sauce, or poached in a delicate lime butter. You just can't go wrong. Unless of course, you don't care for catfish.

Tonight I am going to combine two of my favorite catfish recipes for an even better one. One recipe is for oven fried catfish by Cooking Light. This is a great recipe, and I love the crust. What I don't love is the soaking in beer beforehand. So for the marinade part of the recipe, I will use a recipe by Emeril for Cajun Catfish. Emeril serves his up with chipotle cole slaw and wraps it up in a taco shell. Fabulous! The chipotle slaw is incredible. But for tonight I will use Emeril's marinade, CL's coating and method, and serve up the catfish with some magnificent Macaroni and Cheese (per Zander's request today).

Here is the CL recipe:
Oven-Fried Catfish

You can use your favorite hot sauce, but we prefer the Louisiana brand in this recipe.

1/2 cup light beer
1/2 cup hot sauce
4 (6-ounce) farm-raised catfish fillets
1/2 cup yellow cornmeal
2 tablespoons cornstarch
1/8 teaspoon salt
1/8 teaspoon black pepper
Cooking spray

Combine first 3 ingredients in a large zip-top plastic bag; seal and marinate in refrigerator 30 minutes. Remove fish from bag; pat dry with paper towels. Discard marinade.
Preheat oven to 450°.
Combine cornmeal, cornstarch, salt, and pepper in a shallow dish. Dredge fish in cornmeal mixture.
Lightly coat fish with cooking spray. Place fish on a baking sheet coated with cooking spray, and bake at 450° for 15 minutes or until the fish flakes easily when tested with a fork. Yield: 4 servings (serving size: 1 fillet)

NUTRITION PER SERVINGCALORIES 296(27% from fat); FAT 8.8g (sat 1.9g,mono 3.1g,poly 2.5g); PROTEIN 32.8g; CHOLESTEROL 99mg; CALCIUM 74mg; SODIUM 361mg; FIBER 1.1g; IRON 2.8mg; CARBOHYDRATE 17.7g

Cooking Light, JULY 2001

And here is Emeril's recipe for catfish, followed by his recipe for the chipotle slaw.

* Exported from MasterCook *
Catfish Tacos

Recipe By :Emeril

2 catfish fillets
1/4 cup milk
1/4 cup creole mustard
1 teaspoon hot sauce
3/4 teaspoon salt
1/4 teaspoon cayenne pepper
1/2 cup flour
1/4 cup yellow cornmeal
1 tablespoon Essence

Cut fish into 1 inch strips. Place ina bowl with milk, mustard, hotsauce, salt and cayenne. Refridgerate 1 hour.
Heat oil to 350. Combine flour, cornmeal, and essence. Dredge fish and deep fry until golden brown. Season with salt and pepper to taste.
- - - - - - - - - - - - - - - - - - -
Per Serving (excluding unknown items): 695 Calories; 12g Fat (16.3% calories from fat); 64g Protein; 78g Carbohydrate; 5g Dietary Fiber; 193mg Cholesterol; 1892mg Sodium. Exchanges: 5 Grain(Starch); 7 1/2 Lean Meat; 0 Vegetable; 0 Non-Fat Milk; 1/2 Fat.
NOTES : Serve with Chipotle Slaw.

Chipotle Slaw! Yum, make it often, it is just slightly warm on the tongue, but oh so good.

* Exported from MasterCook *
Chipotle Coleslaw
Recipe By :Emeril

2 teaspoons chipotle chiles canned in adobo -- finely chopped

1/2 cup mayonnaise

2 tablespoons honey

1 tablespoon lime juice

1 cup cabbage -- shredded

1 cup red cabbage -- shredded

1/4 cup red onion -- finely chopped

1/4 cup green onions -- chopped


Combine and chill until serving with catfish and corn tortillas.
-