This bagel recipe is from the King Arthur Flour Baker's Companion. As I mentioned before- the dough is more stiff than bread dough, and by all means, if you like to use a mixer to knead, go ahead. I followed this recipe to a "T", and I used brown sugar as my brown sweetener. Next time I intend to pick up a bottle of barley malt syrup, but the brown sugar did work just fine. And lastly, watch the baking. I think I would have liked them just a tad darker, but I already baked them a full 30 minutes, so I thought that was probably long enough- let the color be your gauge. And please let me know if you try them! I'd love to hear how they work out for you, and what additions you come up with.
Makes 8 Bagels.
Dough:
1 Tablespoon instant yeast
4 Cups unbleached bread flour
2 teaspoons salt
1 Tablespoon non-diastetic malt powder, brown sugar, or barley malt syrup
1 1/2 Cups lukewarm water
Water Bath:
2 Quarts (64 ounces) water
2 Tablespoons (1 ounce) non-diastetic malt powder, brown sugar, or barley malt syrup
1 Tablespoon granulated sugar
Combine all the dough ingredients in a mixing bowl and knead vigorously, by hand for 10 to 15 minutes, or by machine on medium-low speed for about 10 minutes. Since you're using a high-protein bread flour, it takes a bit more effort and time to develop the gluten. The dough will be quite stiff; if you're using an electric mixer it will "thwap" the sides of the bowl and hold its shape (without spreading at all) when you stop the mixer. Place the dough in a lightly greased bowl and set it aside to rise until noticeably puffy though not necessarily doubled in bulk, 1 to 1 1/2 hours.
Transfer the dough to a work surface and divide it into 8 pieces. Working with one piece at a time, roll it into a smooth, round ball. Cover the balls with plastic wrap and let them rest for 30 minutes. They'll puff up very slightly.
While the dough is resting, prepare the water bath by heating the water, malt powder, and sugar to a very gentle boil in a large wide-diameter pan. Preheat the oven to 425ºF.
Use a bagel cutter, or use your index finger to poke a hole into the center of each ball, then twirl the dough on your finger to stretch the hole until it's about 2 inches in diameter (the entire bagel will be about 4 inches across). Place each bagel on a lightly greased or parchment lined baking sheet and repeat with remaining pieces of dough.
Transfer the bagels, four at a time if possible, to the simmering water. Increase the heat under the pan to bring the water back up to a gently simmering boil, if necessary. Cook the bagels for 2 minutes, gently flip them over, and cook 1 minute more. Using a skimmer or strainer, remove the bagels from the water and place them back on the baking sheet. Repeat with remaining bagels.
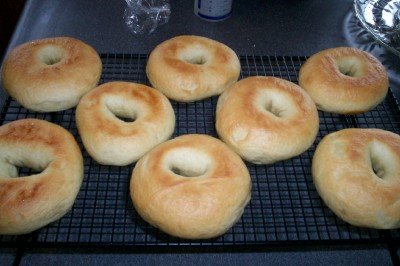
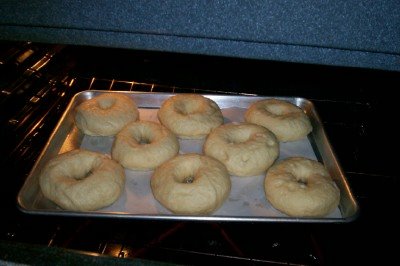
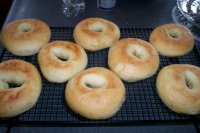
Bake the bagels for 20 to 25 minutes, until they're as deep brown as you like, turning them over after 15 minutes, which will help them remain tall and round. Remove the bagels from the oven and cool completely on a wire rack.
Variations:
Sesame Seed Bagels: Brush each bagel, just before baking, with a glaze made of 1 egg white beaten until frothy with 1 tablespoon of water. Glaze each bagel and sprinkle heavily with seeds.
Onion Bagels: Bake bagels for 20 to 22 minutes (or until they're almost as brown as you'd like) and remove the pan from the oven, keeping the oven turned on. Working with one bagel at a time, glaze as instructed above and sprinkle with minced, dried onion. Return the bagels to the oven for no more than 2 minutes (the onions will burn if left in the oven longer than that).
Cinnamon-Raisin Bagels: Knead about 2/3 cup of raisins into the dough toward the end of the kneading process. Just before you're done kneading, sprinkle your work surface heavily with cinnamon-sugar and give the dough a few more turns; it will pick up the cinnamon-sugar in irregular swirls. Divide the dough into eight pieces, form each piece into a ball, and roll each ball in additional cinnamon-sugar. Let rest and shape as directed above.
 While we were making the rounds, I left a bowl on the porch with a note for everyone to help themselves to two pieces of candy. This actually worked quite well. But when we got back, Abigail wanted to hand it out herself, so I set her up on the porch with some hot chocolate, and she had a blast. She was very generous herself to the visitors. Although not quite enough... we have quite a bit leftover.


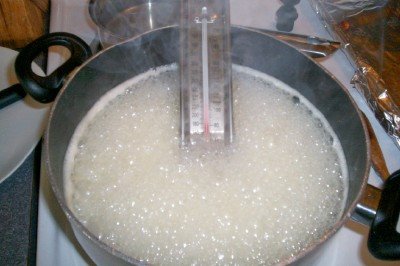
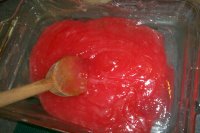
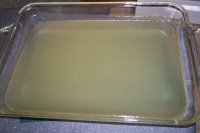 You really want your pan to be cool at this point. The cooler it is, the creamier the end result will be. You can see that it is pretty shiny, and here is where the elbow grease comes in. I took my heavy duty wooden spoon and started stirring. The mixture kind of resembles something unpleasant, rubber cement comes to mind, but I decided this was the perfect time to add my flavoring and color. Today's flavor selection was raspberry. I took some raspberry extract, a few drops of lemon oil, and some red food coloring and stirred it in. Here is the result of that additive.