Thursday, November 30, 2006
Vindication
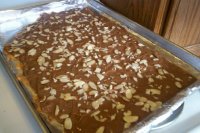
What did I do differently? Nothing. I used a new thermometer that I know is accurate, and it worked like a charm, along with keeping the stove at a medium heat instead of creeping it up higher. I also halved the recipe, and I really think I like it better that way. It allows me to use the same half-sheet pan and get a thinner toffee. I also lined my pan with Reynold's Release Foil, and once again, I cannot praise that product enough. The roca comes right off the foil-without needing to use added butter or spray to the foil. This Christmas Goodie Season brought to you by Reynold's Release Foil. If you haven't tried it- you're missing out.
Here is the recipe I used, created by Anna from Cookie Madness.
Anna's Almond Roca
2 Cups Sugar
1 Pound Butter -- (4 sticks)
1 Cup Water
1/2 tsp. Salt
3 Cups Almonds -- the "shaved" kind
1 tsp. Baking Soda
1 bag milk chocolate chips
Reserve 1 cup of the almonds and set aside. Mix sugar, butter, water, and salt in large, heavy saucepan and heat to boiling over medium to medium high heat. Make sure there's room in the saucepan for the mixture to foam up and boil. Heat mixture over medium to medium high until it foams and reaches 240 degrees on a candy thermometer (don't stir).
When temp reaches 240, stir in 2 cups of almonds. Stir mixture constantly and watch temp carefully until temp reaches 290.
Remove from heat, stir in soda and QUICKLY pour onto a cookie sheet covered with Reynold's Release Aluminum Foil.
Mixture should start to harden immediately. As mixture hardens, sprinkle chocolate chunks over hardening mixture and spread the chocolate chunks around until they melt. Sprinkle melted chocolate with reserved almonds. Let sit until toffee hardens and chocolate sets.
Wednesday, November 29, 2006
Not much
Yesterday I did successfully make a truffle variation, but I'm not quite ready to share the method I used yet- it may need some tweaking. However, I can say that this year I bought some chocolate molds- and it makes a fantastic truffle shell! It is so much easier to fill a piping bag and fill small little shells than it is to hand-dip these particular soft truffles. I will be using the hand-dipping for the fondant centers, mints, and coconut bites, but for the truffles- wow! I'll be sure and show some pictures of that process soon.
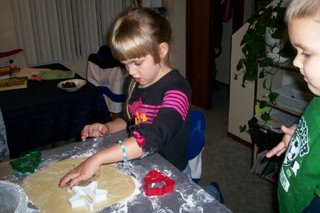
I also decided that I needed to make some sugar cookies yesterday. I thought Abigail would enjoy cutting out some cookies after school, and I was right on with that one. Both kids had a blast cutting out cookies, and of course sampling some afterwards. We were going to ice and sprinkle them too, but I ran out of time and since we have ballet tonight, the icing will have to wait until after school on Thursday. You can find the recipe for Sugar Cookie Cutouts in the Recipe Trove, and here are some pictures of my little cookie monsters busy at work.
Tuesday, November 28, 2006
Things that make you go...
I have to confess. I don't have much to blog about today. I've been in such a streak with blogging, updating almost every day. And I've spent the last two days putting up Christmas decorations, and haven't been cooking or creating. I'm officially sick of leftovers- although in the back of my head I'm thinking that I need to make that turkey again very soon. We went through the leftovers in no time, and there are a whole slew of post-Thanksgiving recipes that I never got around to trying. However, I thought I'd post a few suggestions for your turkey leftovers- should you still have some. (Although if you haven't used it up by today- may I suggest the freezer for long-term storage?)
First on my list of leftover favorites is my Deep Dish Chicken Pot Pie. Make it with leftover turkey, and any stray veggies you want to throw in. This would be an excellent place to use up those vegetables that are languishing from your crudite plate. Need a sandwich idea? This panini from Rachael Ray would be most excellent with some turkey added to the mix. A family favorite around here, White Chicken Chili is always fantastic made with turkey leftovers. Another favorite recipe came from my brother and sister in law years ago. I've changed it up a little, and it does contain that infamous can of cream of mushroom soup, but I wouldn't have White Chicken Enchiladas any other way. And finally, a Cooking Light favorite is Cheddar Chicken Chowder. It won't quite be the same using pre-cooked turkey, but I promise that this soup is excellent, and one of our favorites.
Well, I guess that's it. Today we are going to put up Christmas decorations at church. I had been hoping to find some time to make another flavor of fondant or attempt a unique variation on a truffle. We'll see. Hopefully tomorrow I can figure out something a little more exciting to post about.
**Editing to add that if you're looking for more entertaining reading, I have an article up this morning on Kids Cuisine about kid-friendly fudge. If you're looking for an easy gift idea, this is the solution for you!
Sunday, November 26, 2006
Revisiting India
Friday, November 24, 2006
A Little Re-Cap
Thanksgiving was fantastic. A wonderful day and a wonderful dinner was had by all. And even though the food was (ahem) quite good, it really was the company that made the day special. So thanks all for coming!
I wasn't going to post food pictures this morning because by now I assume most people still have this full feeling in their stomachs that I am experiencing this fine morning. But then I thought, hey, maybe someone wants to see my turkey.
But first, I have to tell the family in attendance that I cannot figure out how to get a poll on here. If I figure it out, it will be here, but I designed the darn thing, and it doesn't show up. So, sorry! But if you'd like to leave a comment about what your favorite thing was... and maybe what your least favorite was, that will help me prepare for the years to come, since I was officially passed "the wooden spoon" last night.
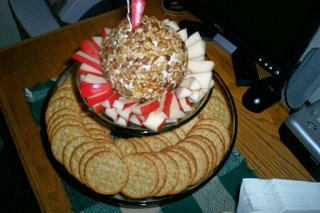
Here at the left you see my Gorgonzola-Walnut Spread in the form of a cheese ball. My sister Lizzie artfully arranged the red pears and crackers around the ball. Looks good huh? Yeah, it turned out pretty well, I would say. I would love a tip from anyone though on how to keep tiered platters from sliding around on each other. It made the cheese ball a little hard to get at.
Here at the right is the Cider-Brined and Glazed Turkey waiting to be carved. It was hard to get a good pictured that really captured how caramelized and gorgeous the skin got. It started darkening up within the first hour, so after two hours had passed, I needed to cover with foil, but the overall result was moist and juicy. Mmm. Can we say turkey sandwiches anyone?
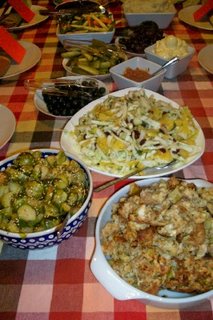
And then here to the left you can sort of see most of the rest of the meal. Right at the front is Mom's stuffing, followed by the sesame brussels sprouts, then the fennel and orange salad. Behind that is the group of pickles/olives/spreads, and way back there are some beans and carrots with lemon chive butter and the mashed potatoes.
Not everything fit on the table exactly, so it needed to be placed on the counter and transported one at a time. It was definitely way too much food.
Again, a huge thank you to the family who came and made the day so special for my family. The kids were just thrilled to see everyone who was here, and I have no doubt they fell asleep with smiles on their faces. Although Zander wsa a little confused when I tucked him in. "But Mommy! We didn't do Thanksgiving yet!" And now I am off to experience the madness known as Black Friday. It wasn't in my plans for this weekend, but my baby sister talked me into it, so off I go.
Thursday, November 23, 2006
Happy Thankgiving!
Wednesday, November 22, 2006
A Last Minute Addition.
So, my good friends at Recipezaar to the rescue. Autumn Pumpkin Cream Cheese Pie is what I settled on. I thought it should produce a pie somewhere between a cheese pie and a custardy pumpkin pie, and I was spot on. I had too much filling for the pie shell, so I was able to bake up a bit in a ramekin for tasting purposes. It is very light and fluffy in texture. The cheese flavor was really mild, but I suspect that after chilling it should taste more like cheesecake. And the pumpkin pie flavor was there as well. All around, a nice lighter-textured pie. Abigail enjoyed the taste she had, and topped with whipped cream it will make a delightful late-minute addition to my Thanksgiving feast.
Autumn Pumpkin Cream Cheese Pie
8 ounces cream cheese
2 cups pumpkin puree
1 can sweetened condensed milk
3 eggs
1 teaspoon pumpkin pie spice ( I used a combination of cinnamon, cloves, ginger, and nutmeg)
1 9- inch unbaked pie shell
Preheat oven to 350.
Combine cream cheese& condensed milk until smooth.
Stir in pureed pumpkin,spice& eggs,mix until well combined.
Pour into pie shell.
Bake for 45 minutes or until knife inserted 1" from the edge comes out clean.
Serve warm and enjoy!
Tuesday, November 21, 2006
Turkey and Gravy
So on to today's Turkey Day recipe.
I would hope that by now, most people have an idea as to how they are going to prepare their turkey. If not, I can safely say that the folks over at Epicurious have you covered. Whether you want to inject, rub, fry, roast, or brine your turkey, they know what's going on. I have successfully made a turkey from Bon Appetit for the past several years, you just can't beat their recipes. Today I am going to share their recipe for Herb Roasted Turkey with Apple Cider Gravy. This is a brined turkey, and it really is wonderful. But I have to admit, it's the gravy that's the star here. If you already have a turkey preparation planned, but are looking for something different in terms of gravy, this is your chance. The herbs in the gravy star here and those plain ole' mashed potatoes will become the main attraction bathed in this herb gravy.
Herb Roasted Turkey With Apple Cider Gravy
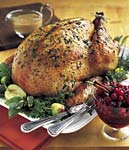
from Bon Appetit Magazine, November 2003
Brining the turkey in the refrigerator for two days ensures an incredibly moist result. We do not recommend stuffing brined turkeys because the brine can make the stuffing too salty. A do-ahead gravy base eliminates last-minute stirring and thickening. Look for fresh bay leaves in the produce section.
Brining
8 quarts cold water
2 cups coarse kosher salt
8 large fresh or dried bay leaves
2 tablespoons black peppercorns
2 tablespoons whole allspice
1 16- to 17-pound turkey; giblets removed, neck reserved
Herb butter and gravy
3 tablespoons minced fresh Italian parsley
3 tablespoons minced fresh thyme
3 tablespoons minced fresh sage
3 tablespoons minced fresh marjoram
1 teaspoon minced fresh rosemary
1 teaspoon ground nutmeg
3/4 cup (1 1/2 sticks) unsalted butter, room temperature
4 cups low-salt chicken broth
2 cups apple cider
3 tablespoons all purpose flour
1/2 cup whipping cream
2 tablespoons Calvados (apple brandy) or other brandy
Roasting
2 large Granny Smith apples, quartered, cored
2 large onions, quartered
1 cup apple cider
To brine the turkey: Line extra-large pot or bowl with two 13-gallon (or larger) plastic bags, 1 inside the other. Combine 1 quart water, salt, bay leaves, peppercorns, and allspice in large saucepan. Stir over medium heat until salt dissolves. Remove from heat. Add 1 quart cold water and cool to lukewarm. Pour into plastic bags; mix in remaining 6 quarts water. Wrap turkey neck and refrigerate. Submerge turkey in brine to cover completely, gathering bags tightly to eliminate any air; tie bags closed. Refrigerate turkey in brine in pot at least 18 hours and up to 20 hours.
Line large roasting pan with 4 layers of paper towels. Remove turkey from brine and drain well; discard brine. Place turkey in prepared pan. Cover with plastic wrap and refrigerate overnight.
For herb butter and gravy: Mix parsley, thyme, sage, marjoram, rosemary, and nutmeg in small bowl. Transfer 1/4 cup herb mixture to small bowl; mix in 1/2 cup butter.
Combine broth and apple cider in heavy large saucepan. Boil until reduced to 3 cups, about 20 minutes. Pour broth reduction into bowl. Melt remaining 1/4 cup butter in same saucepan over medium-high heat. Add flour; stir 1 minute. Whisk in broth reduction, then cream, Calvados, and remaining herb mixture. Bring to boil; reduce heat to medium-low and simmer until gravy base is thickened and reduced to 2 3/4 cups, whisking often, about 20 minutes. Cool gravy base slightly. (Gravy base and herb butter can be made 2 days ahead. Cover and chill.)
To roast the turkey: Position rack in bottom third of oven and preheat to 350°F. Remove turkey from roasting pan; drain any accumulated juices from main cavity. Discard paper towels from roasting pan. Melt herb butter in small saucepan over medium heat. Brush bottom of roasting pan with some of herb butter. Return turkey to prepared pan. Tuck wing tips under; tie legs together loosely to hold shape. Place some apple quarters and onion quarters in main cavity. Brush remaining herb butter over turkey; sprinkle with pepper. Scatter remaining apples and onions around turkey in pan. Add reserved turkey neck to pan.
Roast turkey 1 hour. Baste with 1/2 cup apple cider. Roast turkey 30 minutes. Baste with remaining 1/2 cup cider. Roast turkey until thermometer inserted into thickest part of thigh registers 175°F, basting turkey every 30 minutes with pan juices and covering breast loosely with foil if browning too quickly, about 2 hours longer (3 1/2 hours total). Transfer turkey to platter; let stand at least 30 minutes before carving (internal temperature will rise 5 to 10 degrees).
Discard apples, onions, and turkey neck from pan. Pour pan juices into large glass measuring cup; spoon off fat from surface. Pour degreased juices into gravy base and bring to boil over medium-high heat, whisking occasionally. Boil until gravy thickens enough to coat spoon and is reduced to 3 1/2 cups, about 15 minutes. Season gravy to taste with pepper.
Serve turkey with gravy.
Makes10 servings.
Bon AppétitNovember 2003
Monday, November 20, 2006
Quick Post
Sunday, November 19, 2006
The Other Pie
This year I plan on using the new brown sugar corn syrup instead of the dark, and I tend to use chopped pecans instead of whole. Otherwise, this is the pie.
Cranberry Pecan Pie Recipe
pie pastry
1 cup cranberries, fresh
3 large eggs
2/3 cup sugar
1 cup dark corn syrup
6 tablespoons unsalted butter, melted
1 teaspoon vanilla extract
1/4 teaspoon mace
pinch salt
3/4-1 cup pecan halves
Roll out the pie crust until it 1/8" thick and press into a 9" pie pan. Flute the edges and set aside.
Preheat oven to 350*. (325* if using glass pan).
Process the cranberries until finely chopped; arrange over the bottom of pie shell and set aside.
In a large mixer bowl, beat the eggs till frothy.
Mix in the sugar, corn syrup, butter, vanilla, mace and salt.
Pour the egg mixture over the cranberries.
Arrange the pecan halves on top of pie in circles, beginning with the outer edge and working your way to middle, covering completely.
Bake for 45-50 minutes, or until the pie is golden brown and almost set. it will still be a little shaky but will firm up as it cools.
Saturday, November 18, 2006
Something Exciting!
Friday, November 17, 2006
The Obligatory Pumpkin Pie
Pumpkin filling
Sweetened whipped cream
Thursday, November 16, 2006
A Worthy Salad
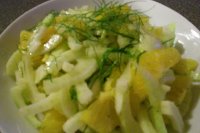
Fennel and Orange Salad is exactly what the turkey ordered. With a meal loaded with flavor and richness, there could be nothing better to cut into that decadence and provide a palate cleanser. I decided I needed to try this salad ahead of time- could it be so good with so few ingredients? I was skeptical, but I really wanted it to work out. One of the things that drew me to this particular recipe was how the orange was prepared. Usually in salads, you see the peel cut away, and then you use a knife to cut into each individual segment, and I usually end up with a mess. Not this salad. The recommended treatment is to cut off the peels and pith and then cut the whole orange in half while standing on end. Then you simply slice each half into slices. The fennel is just as easy to work with. I cut the bulb in half, removed the core, and then cut thin slices until I got to the top of the bulb. The two were combined in a super simple vinaigrette, and the whole salad was delightful. It really was delicious and needs nothing else to make it shine. It will be a perfect addition to my Thanksgiving feast, and can be made several hours ahead of time. Fennel and Orange Salad
from Everyday Food, November 2006
1 tablespoon white wine vinegar
2 tablespoons olive oil
Coarse salt and ground pepper (I used grey salt)
5 navel oranges
3 to 4 fennel bulbs (about 2 pounds total) ends trimmed and cored, quartered lengthwise, and thinly sliced crosswise, plus 1/4 cup roughly chopped fennel fronds
1. In a large bowl, whisk together vinegar and oil; season with salt and pepper.
2, Using a sharp knife, slice off both ends of each orange. Following the curve of the fruit, cut away the peel and the pith. Halve orange from top to bottom; thinly slice crosswise. Transfer oranges, along with any juices that have accumulated on the work surface, to bowl with dressing. Add fennel and, if desired, fronds. Toss to combine.
Serves 8.
Wednesday, November 15, 2006
Appetizer Up!
Tuesday, November 14, 2006
A Wonderful Day!
Anyway, in honor of his arrival home, I decided I needed to make the lucky family dinner today. After driving back and forth and becoming re-acclimated as a family, the last thing they needed to worry about was what was for dinner. Today I had the perfect recipe in mind to welcome the whole family home.
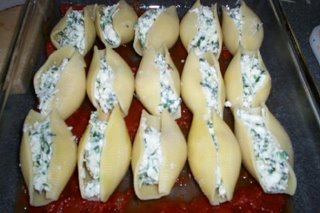
Four Cheese Stuffed Shells is a recipe that I've been playing with on and off. It first appeared in an issue of Cooking Light magazine, accompanied by a "smoky marinara." I did not like the marinara, and the filling needed perking, but I liked the combination of cheese and spinach. So I used that recipe as a springboard for my own version of stuffed shells. The best part of this recipe is that it makes two casserole dishes of shells. You can keep one and give one to a neighbor or friend, or toss the second one into the freezer for another time. Cook once, and you get two meals out of this recipe. Here is a picture of my little shell soldiers lined up awaiting their bath of sausage-laden marinara.
My modified recipe for Four Cheese Stuffed Shells can be found in the recipe trove.
Coming up this week, I've decided to preview the recipes on the menu for Thanksgiving. I'll tackle a recipe or two a day to help you plan your Thanksgiving feast. Unfortunately, there will likely not be any pictures, as I won't be making them this far in advance, but I may do a trial run of one or two recipes.
Also this week, I have a rather fun announcement to make about another little project I've been working on, stay tuned!
Are You Sick of Eggs Yet?
Monday, November 13, 2006
Breakfast for dinner
Sunday, November 12, 2006
The Countdown begins...
Saturday, November 11, 2006
Pantry Dinner
Friday, November 10, 2006
Christmas came early!
It's a Pontiac Aztec, and it is gorgeous. He should have many years of happy driving ahead of him. And by the way, those are snowflakes, they are coming down as I type this in. This morning when I dropped off Abigail for school, she stepped out of the van, stopped and smelled the air, then smiled at me. "Mmmm... Smells like it's gonna snow!" So this snow is for her today. It's too soon to say if it's going to stick though.
I Want Candy!
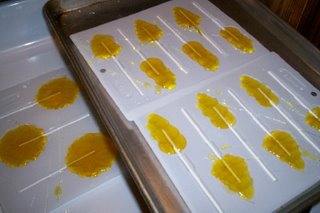
The lesson learned last night? Spray the molds with a nonstick spray before filling with hard-candy sugar syrup. I managed to pop out the larger snowflakes so the kids will be able to sample them after school today, but I doubt I'll be able to get the smaller ones out, so they may just get rinsed down the drain. We'll see though, I have a couple tricks in mind for sucker removal.
After my molds were filled, I had quite a bit of syrup left, so I poured that onto a cookie sheet lined with Reynolds Non-Stick Foil. I was worried about the kids walking up and touching it, so I kind of hovered over it while it cooled. It just kept calling to me, and I kept thinking of those Food Network challenges with the sugar sculptures. I wanted to play with it! So when I thought it had cooled enough, I threw on my rubber gloves for dishes and very carefully, picked at the candy. With the gloves on, I was able to handle it and pull it, and the kids had fun watching Mommy make little candy curly-q's. It didn't take long for it to harden completely, but I did tell Andy last night that I want some good rubber gloves and a heat lamp... I think that playing with that candy was pretty fun, and considering how easy it was to actually make the syrup... there may very well be more candy in my future.
Thursday, November 9, 2006
A change in the air
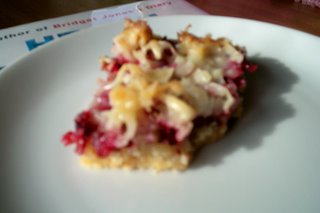
Despite the warm temperatures (and no, I'm not complaining about those God! Keep them going please!) and my grasping of Thanksgiving, I am so rady for Christmas. I've begun thinking about my candy and chocolate making, and thinking about my cookie platters. Yesterday I caught a glimpse of a bag of cranberries in my fridge, and they're looking a little sad, so something needed to be done. I immediately thought of bars. I've been trying different cranberry bars for a few years now, looking for the perfect one for my cookie platters, and have yet to find "The One." I thought I'd re-try one that I had thought okay, but in need of tweaking. And it turned out, that I'd tweaked it the first time, and by sticking to the recipe, I created a delightful cranberry bar.
The original recipe was called Cranberry-Macadamia Bars, and I found it in the 1999 issue of Better Homes and Gardens Christmas Cookie Issue. And although I adore macadamia nuts, this recipe called for a cup of them chopped, and that would cost me around 7 or 8 bucks just for the nuts. I would purchase them if I thought they would star, but looking at the recipe, I knew the cranberries and coconut would take over, so I opted for pecans instead. Other than that, I made two minor changes. I left out the orange zest called for, and I added a drizzle of white chocolate ganache to the top (hey, I'm all about the gilding). They are wonderful! I used my food processor to chop the cranberries, and that worked so well- I was able to get them nice and fine, so there weren't big bites of cranberry overwhelming anything. The coconut got nicely browned and toasty on the top, and I love the shortbread bottom with the pecans. All around, these are a great bar, and they may very well make the cut this year. The red from the cranberries and white from the coconut give them a festive look as well.
Cranberry Macadamia Bars may very well star on my next holiday cookie platter... too soon to tell for sure though.
Wednesday, November 8, 2006
Better Than Take-out!!
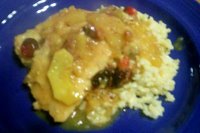
Well, last week I was making this week's menu plan, and I decided that I needed to make some old favorites. So I was flipping through an old Cooking Light annual when I stumbled on this recipe that I'd always wanted to try, but never got around to. So it went on the menu. Honey-Ginger Chicken Bites were billed as an appetizer, but I decided it would be okay to serve it over rice with some veggies on the side. Oh. My. God. This chicken is mouth-watering good. It is very similar to the sesame chicken that we order- only this one is actually better. The recipe called for chicken thighs, and I could not find boneless, skinless thighs anywhere, so I settled for some bone in which I had to de-bone myself, and then some chicken breasts as well. Next time I will make it with only chicken thighs. The thigh bites were tender, juicy, and perfectly caramelized with honey-ginger sauce. The breast bites kind of dried out a little, and while still tasty, the thighs were much more flavorful. Next time I will also eliminate the orange peel, it really didn't add to the dish, and it was a slightly off flavor. The only other change I would make would be to double the sauce when serving over rice.
This was an excellent dinner served with some basmati rice and some sesame oil roasted broccoli and mushrooms on the side. Zander scarfed his down, Abigail not so much, although I'm hoping she'll try again next time because this was an instant hit and will be repeated when I'm in the mood for a take-out night. Now I just need to figure out how to make awesome pot-stickers, and I'll be in Chinese hog heaven.
Tuesday, November 7, 2006
Kay... All Clear
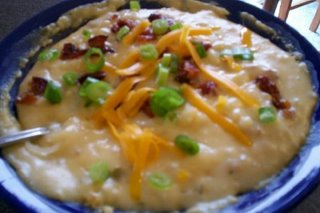
Baked Potato Soup
PSA
Please remember to do your Patriotic duty today and vote. It's important that we remember what makes this country so great- our opinions do matter, and this is the time to show that. Go vote.
Monday, November 6, 2006
It's an obsession.
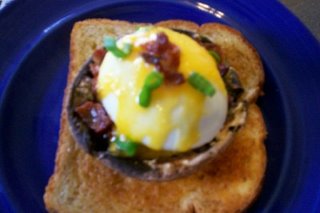
First egg up I brought the water nearly to a boil, dropped in an egg fresh out of the fridge, and brought the whole thing up to a boil. Once it started boiling rapidly, I set the timer for 3 minutes. When it was done, I eagerly hacked into this egg, only to discover runny egg whites. That one went in the disposal. Attempt two was much more successful. My water was already at a hard boil, so I just dropped in another cold egg. I gave this one 4 1/2 minutes. When it was done, I took it out and set it in a bowl to continue internally cooking for a minute. This egg was perfect. The white cooked through, and the yolk... just the way I like it. I was very careful with this egg though, I had planned a special treatment for it. So I very delicately peeled this egg which was not an easy feat, considering the egg was soft and squishy, and I didn't want it to break open in the least.
I started with a portobello mushroom cap (stem removed). I placed this under the broiler with a sprinkling of salt and pepper. After about 3 minutes I pulled the mushroom out. I carefully slid my peeled soft-boiled whole egg onto the mushroom cap. Onto this I sprinkled a tiny bit of cheddar cheese, green onions, and some leftover cooked bacon pieces. The whole assembly carefully slid under the broiler until the cheese was bubbly- maybe a minute or so. And finally, I placed my mushroom/egg stack on top of a slice of buttered toast. The second I cut into that egg with my fork, I knew I had a winner. The egg yolk slowly oozed out and smothered the mushroom cap, pulling along a few crumbs of bacon with it. Every single bit of this egg tower was delightful, and I am contemplating repeating tomorrow- only an English Muffin as the base would be the ultimate breakfast indulgence.
9 Wierd Things Meme
9 Weird Things about me.
1. I don't like ice cream with my cake. I hate it when the ice cream gets all melty and gets into the cake. Separate vessels for me please.
2. My absolute favorite sandwich is banana, peanut butter, and marshmallow. (Sometimes with chocolate for good measure)
3. I love, love, love chopping garlic. Give me a knife and a cutting board and garlic, and I will be a happy person. I will never own a garlic press or chop my garlic in a processor.
4. I don't like sourdough bread. I wish I did, but I keep trying it, and I just don't like that tang in my bread. I don't like white sourdough- or rye breads made with a starter. Ack. Just not for me, I guess.
5. I also don't like butter on my bread unless the bread is warm. I love it when the butter can melt into the bread, but I can't stand cold butter smeared on a slice of cold bread.
6. I love Kool-Aid. Plain old fruity Kool-Aid is my favorite summer-time drink. Give me a choice between a great Iced Tea and Kool-Aid, and I will most often choose the Kool-Aid.
7. Oven-roasted vegetables are the Holy Grail to me. I adore roasting any vegetable with olive oil, salt, and pepper. I'm even contemplating trying roasting lettuce... I just love it when the vegetables get all caramelized and sweet... and watch out if there are mushrooms added!
8. I love tequila. Straight up, in a margarita, or a tequila sunrise... I am a tequila girl.
9. I dream of someday running a Chocolaterie- just like the one in the movie Chocolat. I would love to spend my days making candy and chocolate and other pastries and confections. I love the feel of chocolate tempering with my bare hands. This year I'm hoping to experiment with some savory flavors in my chocolates...
Would you like to do this meme? Consider yourself tagged. You don't have to limit it to foodie choices if you don't want. 9 Weird Things About You.
Slow Weekend
Friday, November 3, 2006
A Quest
Thursday, November 2, 2006
A Classic
Wednesday, November 1, 2006
Thanks to Nigella
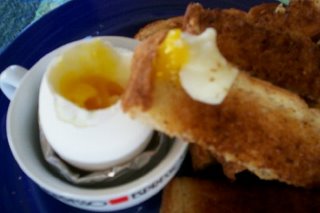
So I followed her directions. Nigella suggested using room temperature eggs, and dropping them into boiling water for 4 minutes. She also said that if your eggs are chilled, you can drop them in the water before it comes to a boil, and that will work as well. So I put a pot of water on to boil and got out an egg. I waited until it was almost boiling before dropping it in and setting a timer. While the egg cooked, I popped a slice of bread into the toaster for dunking in the egg. It seemed like that 4 minutes took forever! When the timer went off I realized I had a problem. I don't have an egg cup. I've never seen a need for an egg cup, to be honest. So I quickly grabbed an espresso cup and put a little foil in the bottom to make a makeshift cup for my egg. It worked okay.
I sliced the top off the egg, which revealed a wonderfully golden center- slightly more cooked than I had hoped for, but still slightly runny, so that was okay. I gave it a sprinkle of good Fleur de Sel and eagerly dunked a toast point. Heaven. Pure heaven. I don't know why it took me so long to try this absolutely simple breakfast. It was fantastic. I think I need to work on my timing just a tad, because I want my egg yolk to be gooey, but overall, I was simply amazed. I had a nice cup of Irish Breakfast tea to accompany, and I had breakfast fit for the queen. If you haven't tried a soft boiled egg, you're really missing out. And now I am on the prowl for some egg cups.